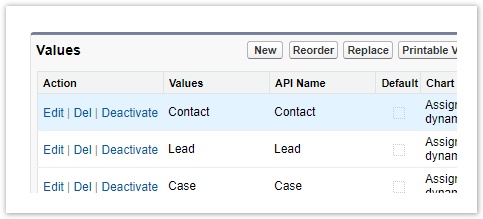
When you create a Dial List you must specify the type of object that is included in the list.
You can enable creating Dial Lists based on other object types—such as Accounts and Opportunities—or custom objects.
| If any of the default object types do not appear in the List Type field when you create a new Dial List, the object type was added since you first installed Connect. To add the missing object type, perform the following tasks. |
How do I enable Dial Lists for additional standard or custom objects?
If you want to add an additional Dial List type, you must perform the following tasks:
For this example, we have a custom object with the following settings:
| Setting | Value |
|---|---|
| Object name | Customer |
| Object API name | Customer__c |
| Phone field 1 | Land Line |
| Phone field 1 API name | Land_Line__c |
| Phone field 2 | Mobile |
| Phone field 2 API name | Mobile__c |
We want the option to specify both Mobile and Land Line as primary or secondary phone numbers.
To enable creating Dial Lists for a object, perform the following steps:
In the Fields & Relationships or Custom Fields & Relationships section, locate and click Type. Type (Managed) appears.
Scroll to the Values section.
Click New. Type appears.

In the text area, type the API name, or names, of the new Dial List type, or types, you want to add. API names of custom objects always end in "__c".
| In our example, we would type Customer__c. |
Click Save. Type (Managed) appears with the new picklist value, or values, listed.
When you create a Dial List, you can now select the new type in the List type field.
| If you are using next contact time, you must create Next Contact Time fields for custom objects. For information about creating the Next Contact Time fields, see Configuring next contact time. |