Creating a Dial List from a list view
How do I create a Dial List from selected records in a list view?
Using Connect you can create a Dial List from records that you select in a list view—this list view can be a view containing existing call records or any other Salesforce object list view that has a Create Dial List button. When you create a Dial List from a view, that Dial List is static and Connect does not refresh the Dial List. For information about dynamic Dial Lists, see Dynamic Dial Lists.
By default you can create Dial Lists of Contact, Lead, Case, Campaign Member, and Task types.
Before you can create a Dial List from a list view, you must create a list view that contains the customers or calls that you require in your Dial List.
To create a Dial List from any of the list views, perform the following steps:
Open the appropriate list view and select one or more records that you want in your Dial List.
Click Create Dial List. Create New List appears.
Create Dial List in Salesforce Classic

Create Dial List in Salesforce Lightning Experience

On the Create New List page, provide the following values:
Field
Description
List Name Type a suitable name for the Dial List that will make the list identifiable later. The value is not unique.  Click Next. The Select phone fields... and Order by fields sections appear.
- Define the phone fields and ordering settings for your Dial List.
- Select phone fields in the order that you require Connect to dial them.
In the Select phone number fields section, define at least one phone field for Connect to use when agents dial customers.
After you select one phone field, select additional fields until you have selected all of the phone fields that you want Connect to dial for the record type. Standard fax phone fields are excluded.
Connect will dial the fields in the order you provide. To the left of each selection is a number indicating the priority of the phone field.
To remove a phone field, deselect it.
You may only chose each phone field once.
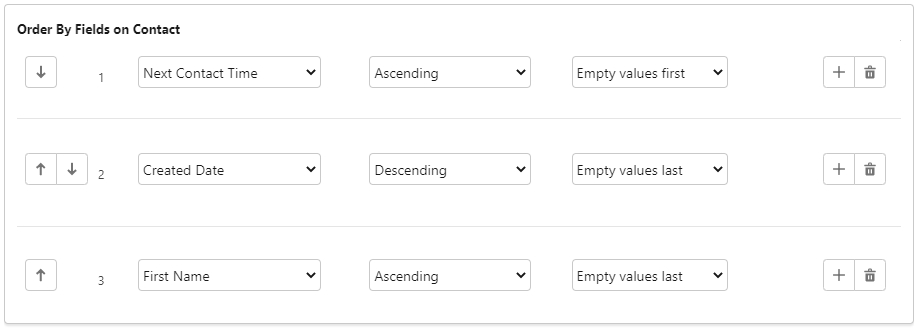
Optional. In the Order by fields section, define the order in which you want the call records to appear in the Dial List.
- In the first field, select the detail used for the first sort option—the available details are determined by the type of Dial List you are creating.
- In the second field, select the sort order.
- In the third field, select whether empty values should appear first or last in the Dial List.
- Select phone fields in the order that you require Connect to dial them.
Click Save. Your new Dial List appears.
Before you or any assigned agents can use your Dial List, you must complete the following tasks: You can also edit filters (where applicable), change the priority of a Dial List, set permissible call times, and edit custom fields. For information about these tasks, see Editing a Dial List.
For general assistance, please contact Customer Support.
For help using this documentation, please send an email to docs_feedback@vonage.com. We're happy to hear from you. Your contribution helps everyone at Vonage! Please include the name of the page in your email.