Managing categories and subcategories
In Category Editor, supervisors and administrators can manage categories and subcategories for existing profiles.
Viewing categories and subcategories
To view a category, perform the following steps:
- Log in to the VCC Admin Portal and go to Category Editor (within Administration). Category Editor appears.
- In the All profiles list, click the profile you wish to view categories for. The profile window opens.
- Navigate through the profile using either the profile tree or the links in the profile table on the right of the screen.
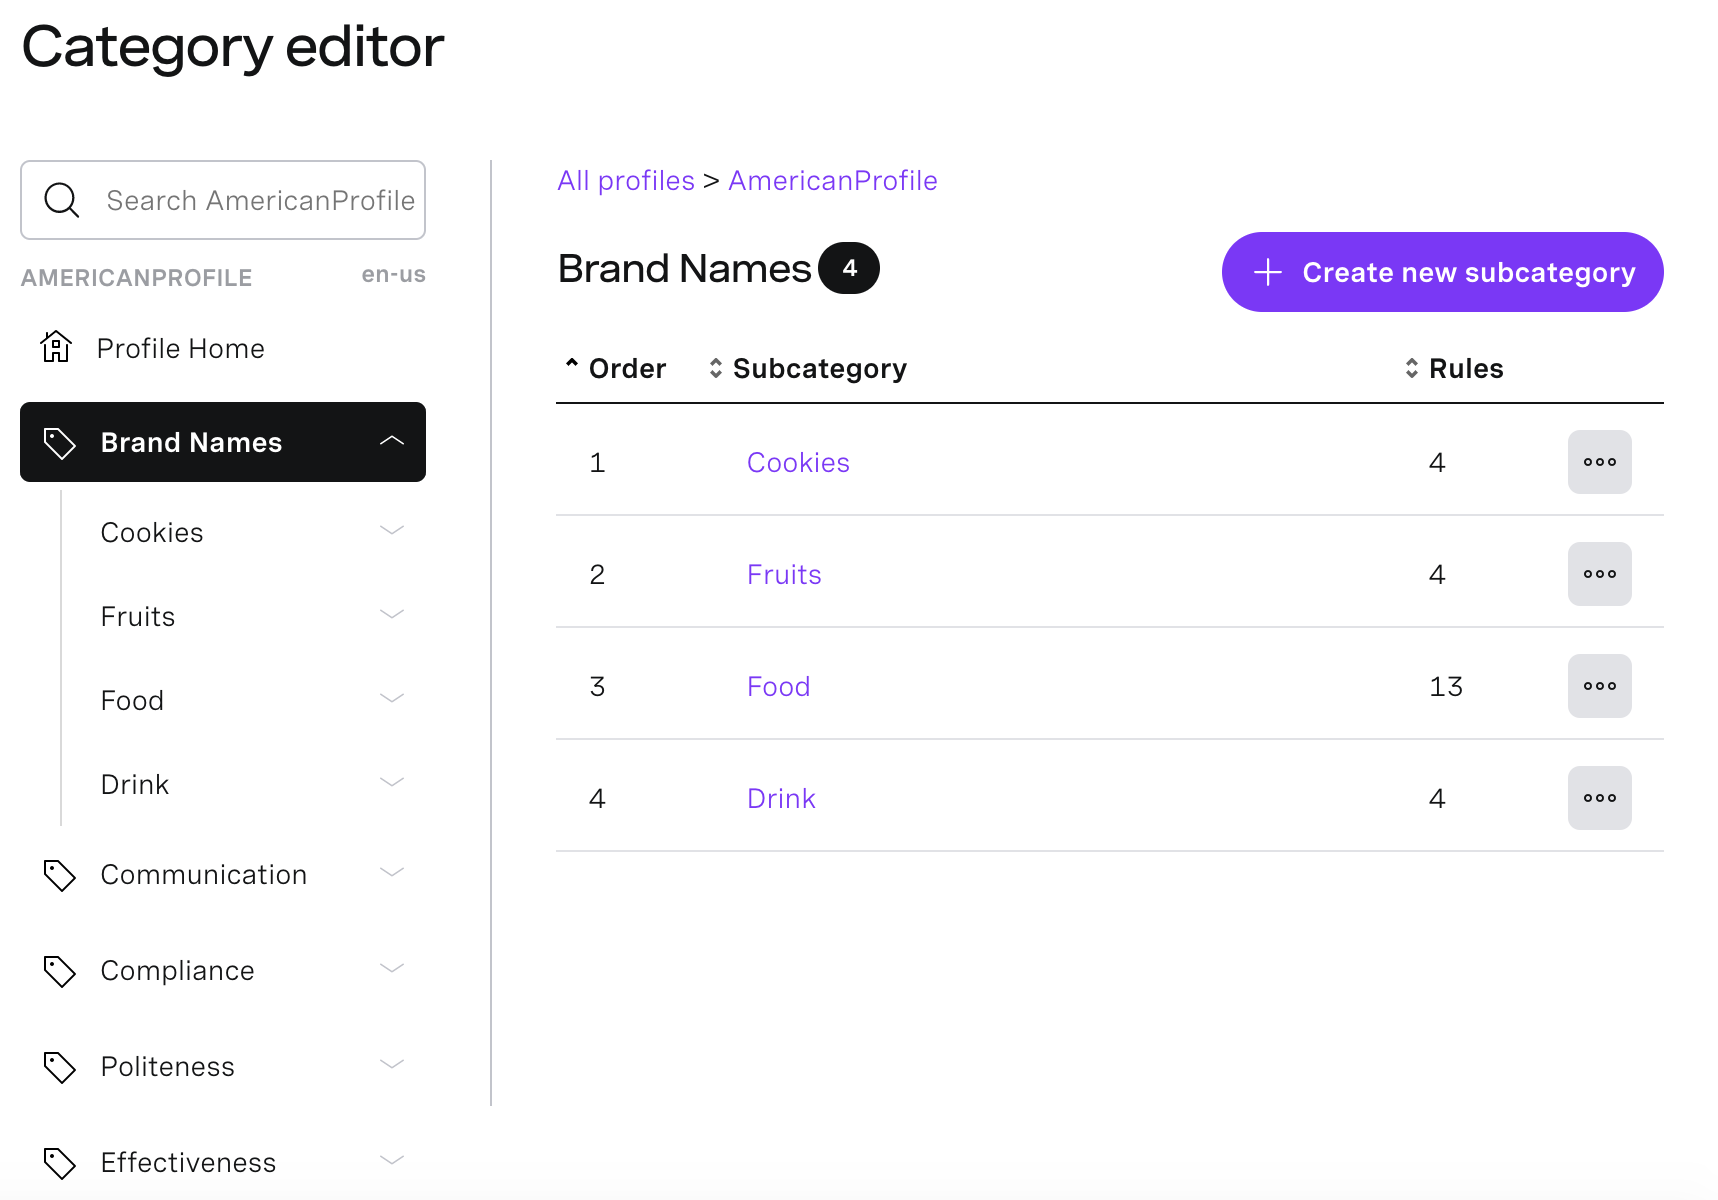
- To view a category, click it in the profile tree. Alternatively click the respective link in the Category column of the profile table. The category expands displaying all subcategories.
- To view a subcategory, either click it in the profile tree, or click the link in the Subcategory column of the category table. The subcategory expands displaying all rules.
Adding categories and subcategories
To add a category to your profile, perform the following steps:
- Log in to the VCC Admin Portal and go to Category Editor (within Administration). Category Editor appears.
- In the All profiles list, click the profile you wish to add categories for. The profile window opens.
- To add a category, click the Create new category button. A new row appears in the profile table.
- Type a name for the category in the Category column.
- Click the green tick icon to create a category.
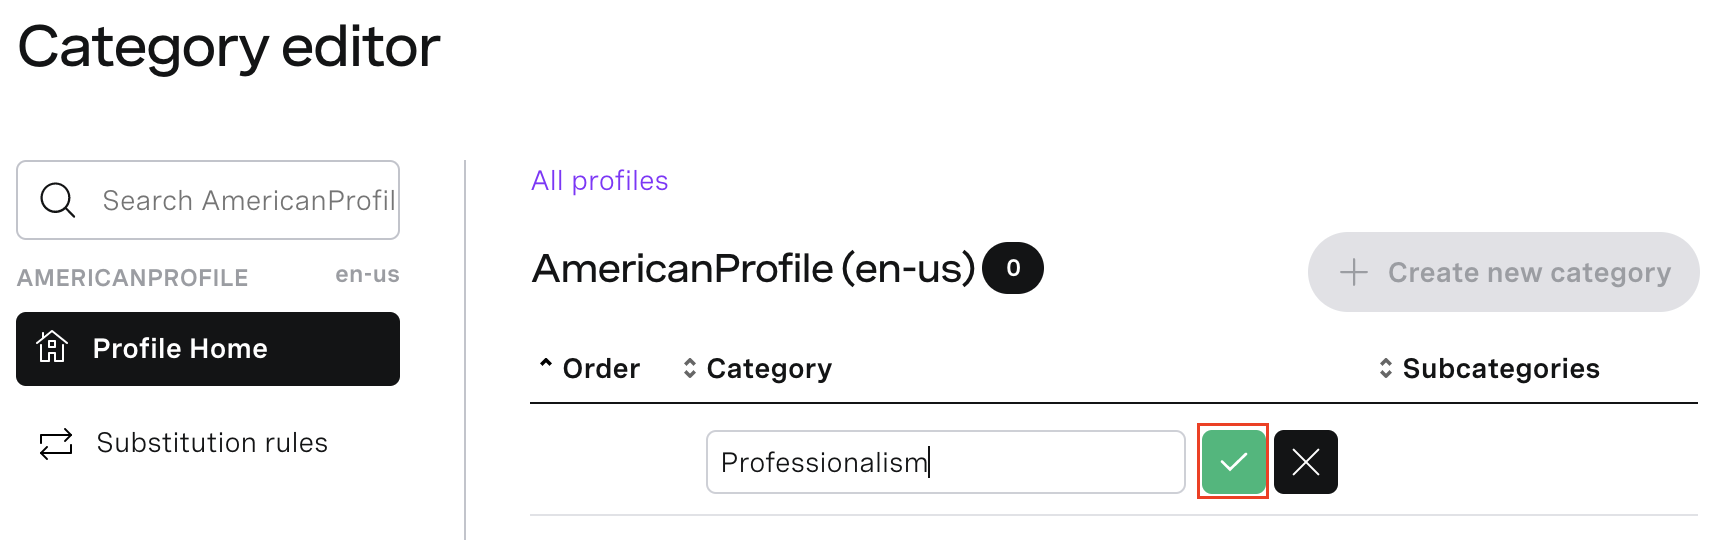
- A message confirming your category was created appears. The category is now added to your profile.
To add a subcategory to your profile, the profile needs at least one category. For information about how to create a category, see the previous steps. To add a subcategory to your profile, perform the following steps:
- Log in to the VCC Admin Portal and go to Category Editor (within Administration). Category Editor appears.
- In the All profiles list, click the profile you wish to add subcategories for. The profile window opens.
- Click the category you wish to add subcategories for. The category table opens to the right of the screen.
- Click the Create new subcategory button. A new row appear in the category table.
- Type a name for the subcategory in the Subcategory column.
- Click the green tick icon to create a subcategory.
- A message confirming your subcategory was created appears. The subcategory is now added to your profile.
Editing categories and subcategories
To edit categories in a profile, perform the following steps:
- Log in to the VCC Admin Portal and go to Category Editor (within Administration). Category Editor appears.
- In the All profiles list, click the profile you wish to edit subcategories for. The profile window opens.
- In the profile table, in the Category column, click the pencil icon next to the category you wish to edit.
- Apply your changes and click the green tick icon when finished.
- A message confirming your profile was updated appears.
To edit a subcategory, perform the following steps:
- Log in to the VCC Admin Portal and go to Category Editor (within Administration). Category Editor appears.
- In the All profiles list, click the profile you wish to edit subcategories for. The profile window opens.
- In the profile table or the profile tree, click the category you wish to edit subcategories for.
- In the category table, click the pencil icon next to the subcategory you wish to edit.
- Apply your changes and click the green tick icon when finished.
- A message confirming your profile was updated appears.
Copying categories and subcategories
To copy a category for potential further edits, perform the following steps:
- Log in to the VCC Admin Portal and go to Category Editor (within Administration). Category Editor appears.
- In the All profiles list, click the profile you wish to copy categories for. The profile window opens.
- In the profile table, click the ellipsis to the right of the category you wish to copy.
- Click Copy.
- Confirm that you wish to copy the category. Click Yes.
- A message confirming your category was copied appears. You can now find your category in the profile window with a COPY_ prefix. All subcategories and categorization rules are copied along with the category.
To copy a subcategory, perform the following steps:
- Log in to the VCC Admin Portal and go to Category Editor (within Administration). Category Editor appears.
- In the All profiles list, click the profile you wish to copy subcategories for. The profile window opens.
- In the profile table or the profile tree, click the category you wish to copy subcategories for.
- In the category table, click the ellipsis to the right of the subcategory you wish to copy.
- Click Copy.
- Confirm that you wish to copy the subcategory. Click Yes.
- A message confirming your subcategory was copied appears. You can now find your subcategory in the category table with a COPY_ prefix. All categorization rules are copied along with the subcategory.
Deleting categories and subcategories
In the Category Editor area of Vonage Contact Center, you can also delete categories and subcategories from your profile. To delete a category, perform the following steps:
- Log in to the VCC Admin Portal and go to Category Editor (within Administration). Category Editor appears.
- In the All profiles list, click the profile you wish to delete categories for. The profile table opens.
- In the profile table, click the ellipsis to the right of the category you wish to delete.
- In the context menu, click Delete.
- In the message that appears, click Yes to confirm deletion. The category is deleted.
- A message confirming the deletion appears.
Deleting a category also deletes all subcategories and rules associated with that category.
To delete a subcategory, perform the following steps:
- Log in to the VCC Admin Portal and go to Category Editor (within Administration). Category Editor appears.
- On the All profiles list, click the profile you wish to delete categories for. The profile table opens.
- In the profile table, click the category you want to delete subcategories for. The category table opens.
- Click the ellipsis to the right of the subcategory you wish to delete.
- In the context menu, click Delete.
- In the message that appears, click Yes to confirm deletion. The subcategory is deleted.
- A message confirming the deletion appears.
Deleting a subcategory also deletes all rules associated with that subcategory. The parent category, however, is not deleted.
For general assistance, please contact Customer Support.
For help using this documentation, please send an email to docs_feedback@vonage.com. We're happy to hear from you. Your contribution helps everyone at Vonage! Please include the name of the page in your email.