Insight & Predict Setup for Motivate v3 (base app v7)
This page goes through how to set up and configure the Prediction functionality that is available in Opportunity Insights, as well as how to deploy Insight & Predict in your Salesforce org.
For further information on how to use and manage Opportunity Insight, please refer to the Opportunity Insight Training page.
Define the Winning Way
The first step in configuring Insight & Predict is to define the Winning Way, which needs to be created for each Opportunity Record Type that you intend to use the Prediction capability on. A Winning Way record is linked to an Opportunity Record Type, and within each Winning Way are a number of Winning Way Steps. Each Winning Way Step relates to a specific Sales Stage in the Sales Process and, for each Winning Way Step, a Behaviour Template must be defined that contains the Behaviours that are to be completed for that Winning Way Step (i.e. Sales Stage).
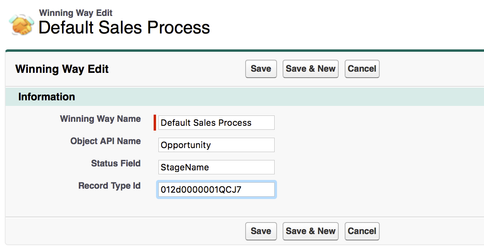
- Go to the Winning Ways tab
- Click New to create a new Winning Way (one is required for each Opportunity Record Type that is to include the Prediction capability)
- Enter a name in the Winning Way Name field, e.g. "Default" for the default opportunity record type
- Enter Opportunity in the Object API Name field
- Leave the Status Field as StageName
Enter the Record Type ID of the required Opportunity Record Type (either the 15- or 18-character value)
Note:If required, a Winning Way can be set up which will be utilised for any Sales Processes that don't match any defined Winning Ways, by leaving the Record Type ID field blank. An example where this could be used would be when multiple Opportunity record types are used within a single sales process (which has been defined programmatically).
Also, if the org has only one sales process, the Record Type ID field could be left blank for convenience. Then, if any new Sales Processes are subsequently added, for which different Winning Ways are required, the Record Type ID would then need to be added.Click Save
Prior to performing the following steps, it is recommended that you create a Behaviour Template for each step in the sales process. These Behaviour Templates should in turn be populated with the Behaviours that are required to drive a successful opportunity to closure. Completing these behaviours at each stage of the process will be an important factor in determining an outcome prediction.
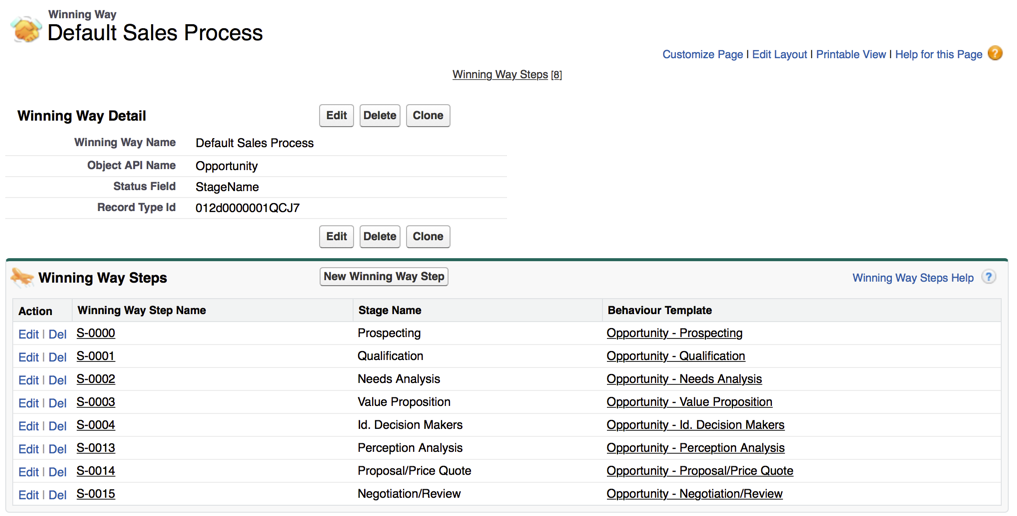
- Click the New Winning Way Step button in the Winning Way Steps related list
- Enter the first Stage as required, e.g. Prospecting (the name must be an exact match to the stage name)
- Use the Behaviour Template lookup to select which Behaviour Template you'd like to use for the individual sales stage being defined within the Winning Way.
- Click Save & New, and continue setting up a Winning Way Step for each of the Sales Stages as required.
For example, if Salesforce's default opportunity record type sales stages are being configured, the following Winning Way Steps will need to be defined:
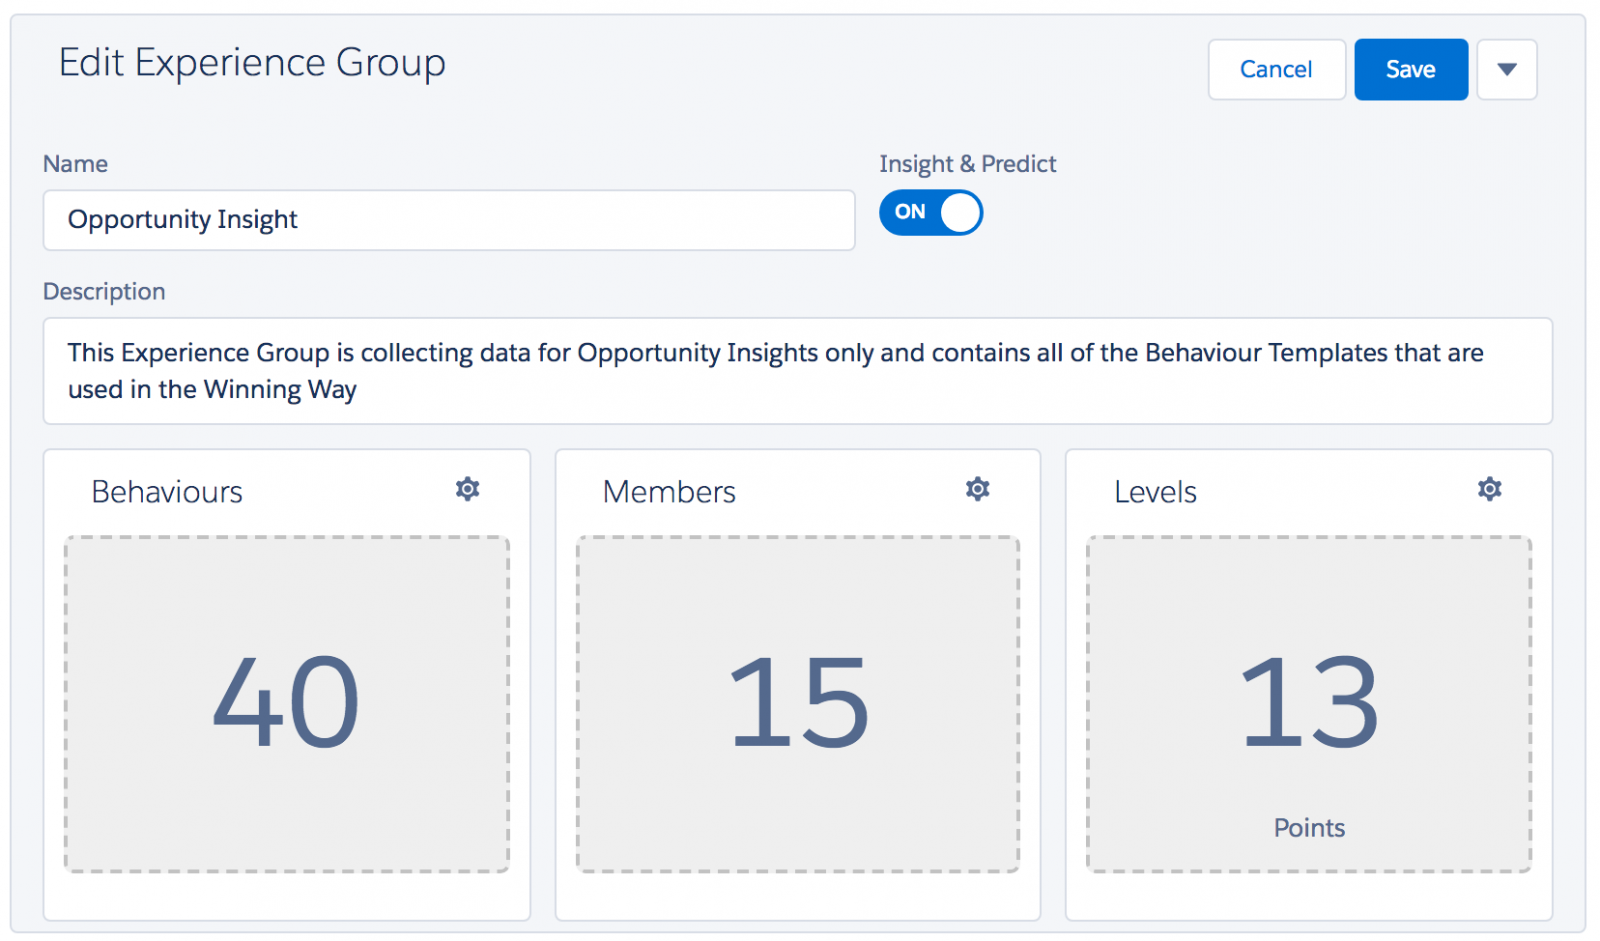
Enable Collectives
Once the Winning Way has been defined, customers must decide which collectives (Competitions or Experience Groups) they wish to use in conjunction with Insight & Predict. It is expected that collectives that are enabled for Insight & Predict will contain the Behaviour Templates that have been defined on the Winning Way Steps, so the Rewards that have been generated from the Behaviours contained within these templates are included in Opportunity Insight against the Opportunity records that triggered the Reward.
Lightning App Page
The standard installation includes an Insights tab deployable in the Classic Salesforce UI. A native Lightning Experience tab can also be created for use in Lightning applications. If you are setting up a native Lightning Insights Tab (as described below), you should either hide the Classic UI version of this tab (from Lightning Experience users) or give the Lightning Experience tab a unique name to differentiate it.
In order to access the Insight & Predict Lightning components in the App Builder, customers must ensure that My Domain has been enabled and configured in the org. For further information on My Domain, please see the following Salesforce help article: Domain Name overview
- Click on the Setup button at the top of the screen and then click on the Setup link
- Within the sidebar under Platform Tools | User Interface click on Tabs
- Under Lightning Page Tabs, click on the New button
- In the Lightning Pages picklist, select Opportunity Insight [success__Insight]
- For the Tab Label and Tab Name fields, enter Insights or a unique name if the Classic version of the page is in use
- For the Tab Style, choose Lightning from the lookup and then click the Next button
- Assign the Lightning Page Tab to all of the Profiles that require access
- Click the Save button to complete the task and to create the Lightning Page Tab
- Within the sidebar under Platform Tools | Apps click on Lighting App Builder
- Click on View next to Opportunity Insight, and then click on the Activation button
- In the Activation modal under the Lightning Experience tab, select the Sales Lightning App in the left column, and then click on the Add page to app button to add the Performance Centre page to the right column
- In the right column, drag and drop the Insights page to the desired position that it will be displayed on the Tab bar
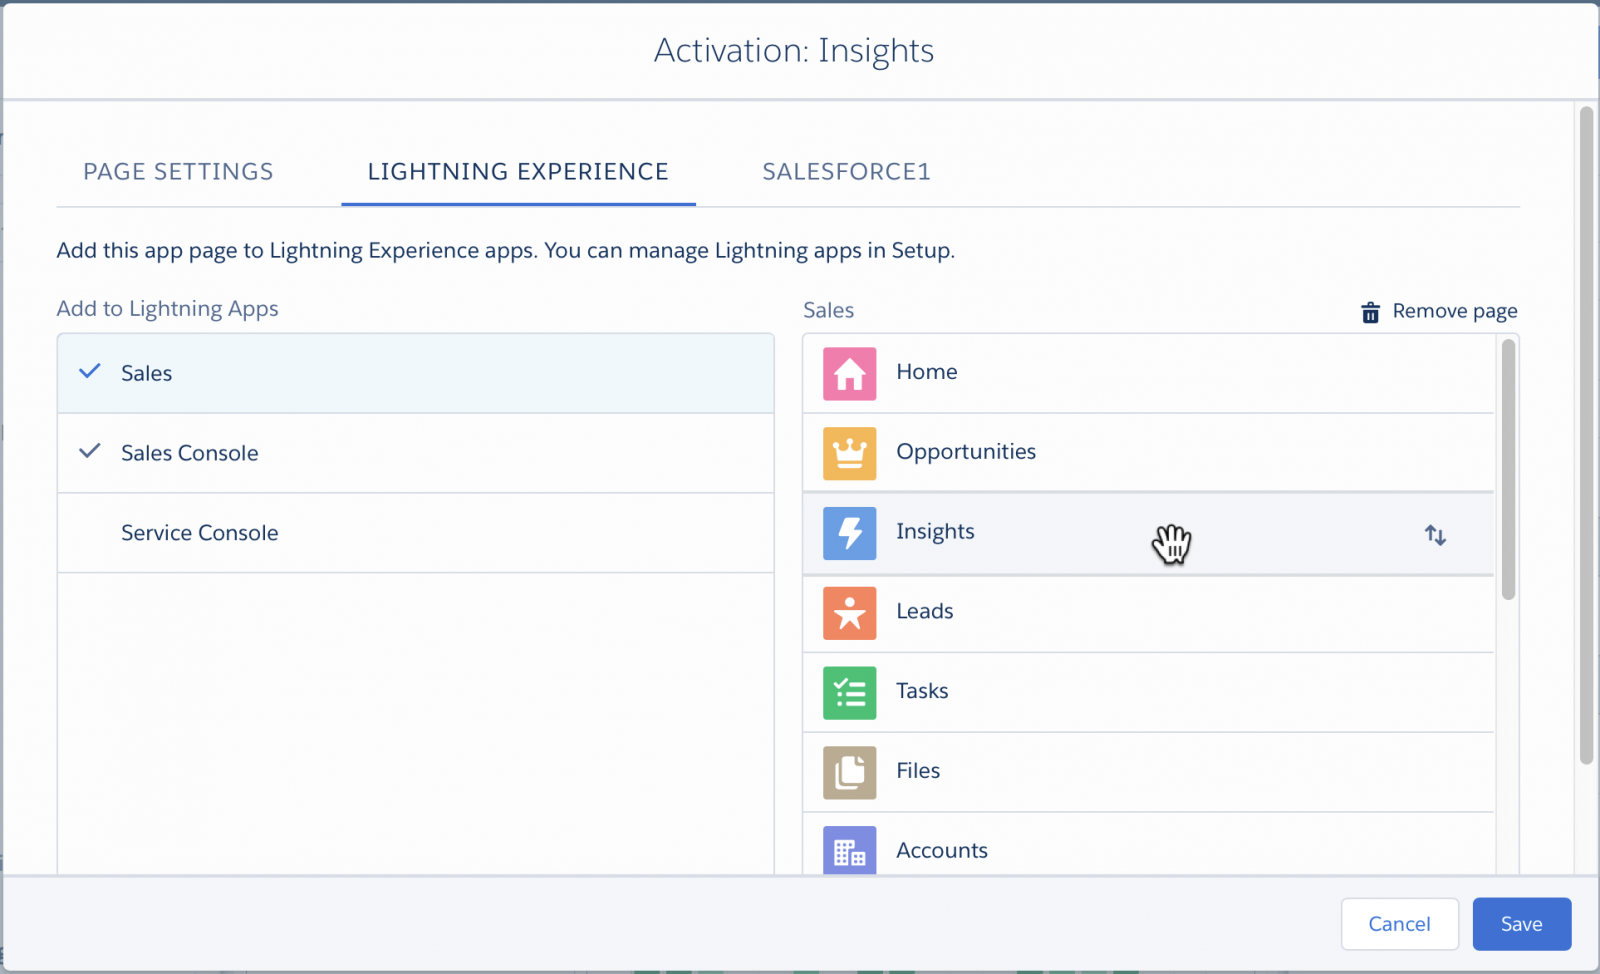
- If the Insights page should be accessible in Salesforce1, click on the Salesforce1 tab and then click on the Add page to app button
- Repeat steps 12 and 13 for all other Lightning Apps that require access to the Insight page
- Click the Save button to return to the Lightning App Builder
- Click the Back button to complete the task and finish configuring the Performance Centre page
Opportunity Record Page - Lightning
This section contains describes how to configure a Lighting Opportunity record page to include Insight & Predict information in line with the opportunity information already displayed on the page. The configured page can then either be assigned as the default record page (visible in apps that don't have another custom record page assigned), or be assigned to specific apps.
In order to access the Insight & Predict Lightning components in the App Builder, customers must ensure that My Domain has been enabled and configured in the org. For further information on My Domain, please see the following Salesforce help article: Domain Name overview
- To begin with the current default page layout, open an existing Opportunity
- From the Salesforce setup icon at the top right, select Edit Page
- Decide where on the page you would like to add the Insight Detail component, the following instructions describe placing it in our recommended position
- Hover over the Tabs section - with Activity, Chatter and Details - until the blue dot becomes a plus sign and click to select this location
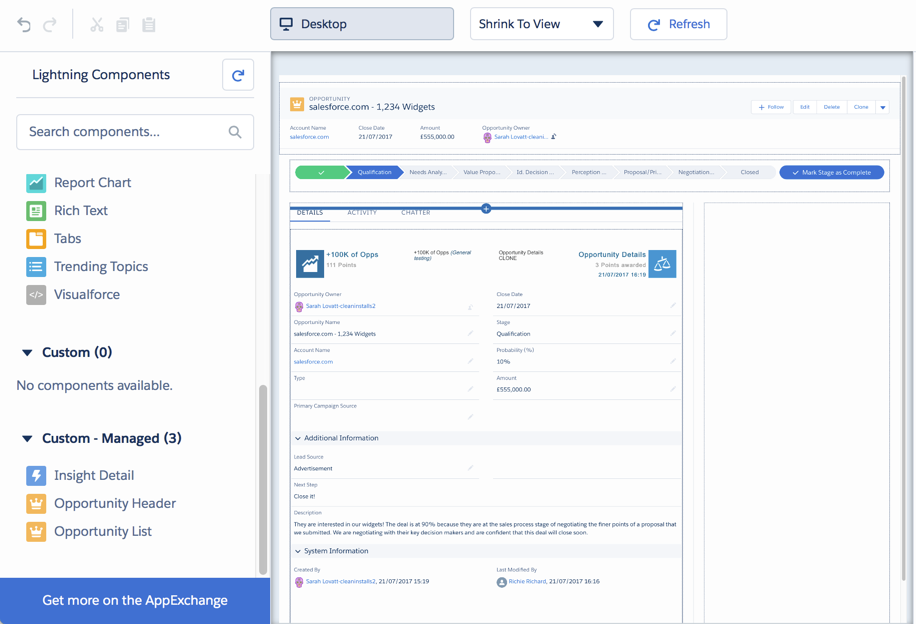
- Click on the Insight Detail component in the Lightning Components list on the left, in the "Custom - Managed" section. This will add the component to that position.
- In the right-hand column, you'll see 7 different items that can be displayed or hidden on the Insight Detail section of the Opportunity page layout:
- Show Behaviours by Type Chart
- Show Behaviour by User Chart
- Show Behaviours by Value over Time Chart
- Show Charts
- Show Related Tables - i.e. the Rewards and Behaviours tables
- Show KPI Cards
- Show Prediction
- Uncheck any of the sub-sections that are not required for display within the page, e.g. the "Show Related Tables" (the list of Reward earned and Behaviours required) and "Show KPI Cards" as shown in the screenshot below
- Click Save

- To Activate this page to make it visible to your users straight away, click Activate on the resulting popover
- In the next popover, Activation for Opportunity Record Page, select the required option, e.g. "Assign this page to specific apps" to assign it to the Sales App.
- Click Next and then Save
Opportunity Page Layout - Classic
The following steps are optional and only required if the Opportunity Prediction component should be visible to users when they view Opportunity record pages in Salesforce Classic. The Opportunity Prediction component is also displayed on the Insights tab which can be limited to a subset of users, e.g. Sales Operations and Sales Management, if required. It is, therefore, not necessary to also place this component into the opportunity details page viewed by all users unless that is specifically required.
- Enter Setup by clicking on the Setup link at the top of the screen
- Within the sidebar select Build | Customize | Opportunities | Page Layouts
- Click Edit beside the Opportunity Layout page layout on which you wish the Prediction to appear
- Add a new section to the page named Prediction. The Prediction section can be placed anywhere you wish; our suggestion is to place it immediately below the Opportunity Informationsection
- Leave the Detail Page and Edit Page checkboxes selected in the Section Properties
- Click 1-Column in the Layout section
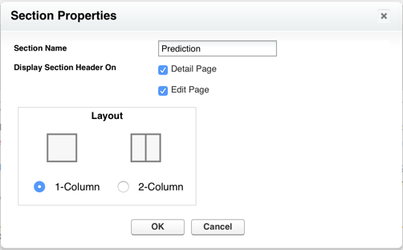
- Click OK
- In the Opportunity Layout section at the top of the page, click on Visualforce Pages:
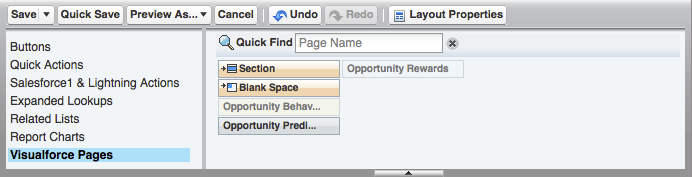
- Drag the Opportunity Prediction element and drop it into the new Prediction section.
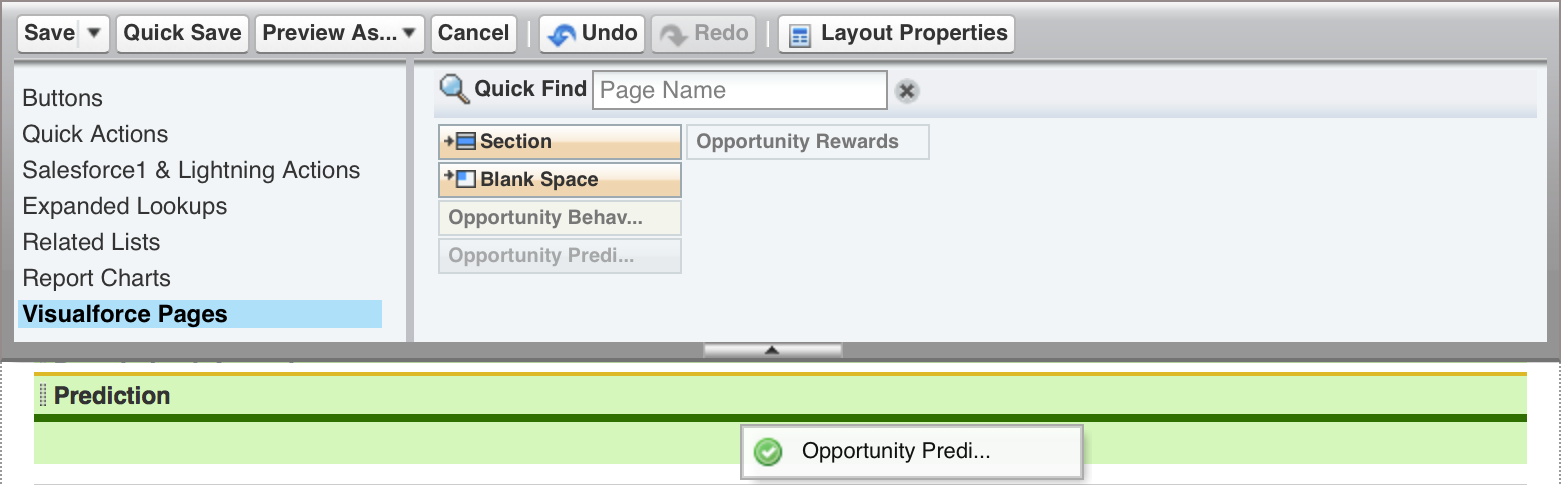
- Hover the cursor over the Opportunity Prediction element and click the Properties "wrench" icon that appears in the top-right corner
- In the resulting pop-up window, set the Height (in pixels) field to 80
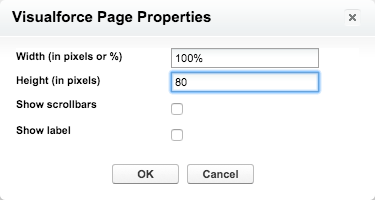
- Click OK
- Click the Save button to complete the task and save your changes to the page layout
For general assistance, please contact Customer Support.
For help using this documentation, please send an email to docs_feedback@vonage.com. We're happy to hear from you. Your contribution helps everyone at Vonage! Please include the name of the page in your email.