Configuring Webchat
If enabled for your account, you can add Webchat to your website and link it to an interaction plan to start routing chat interactions to your agents.
Before you can configure Webchat, Vonage must set it up for your account.
| In this page |
|---|
Configuring Webchat
Create a destination for chat interactions
Before using Webchat, you must create a destination in Interaction Plans Manager and map that destination to your chosen interaction plan. For information about using Interaction Plans Manager, see Interaction Plans Manager.
Embed Webchat on your website
To generate a chat widget code snippet to embed into your webpage, go to Web Chat (within Business Apps) in the Vonage Contact Center (VCC) admin portal. In Widget destination, type the name of the destination you created above, in Interaction Plans Manager, and click Generate. Click the divider icon, to the left of the delete icon. The generated widget code appears.
Copy and paste the code into your webpage. Replace {HEADER} in the code. This value appears as the title of the page in the webchat window. You can use plain text or leave empty.
Configure capacity
When you know how many chat interactions you want an agent to handle at any one time, configure their interaction capacity. You can configure capacity for all agents in your account, or for individual agents.
For information about configuring capacity for all agents, see Interaction Capacity Settings in Editing Configuration (Account Settings); for information about configuring capacity for individual agents, see How do I set interaction capacity for an agent user? in Configuring individual users.
Validating Webchat function
After configuration, clear your browser cache and on your premises and load the website in the supported browser. To validate whether Webchat works as expected, check the bottom-right corner of your browser window and look for a floating icon:
Click the icon and a chat widget will appear. You can type in a message. If you have correctly linked the chat widget to an interaction plan, the message will be routed to an agent.
Configuring Webchat for Salesforce
Configure an interaction plan
The destination interaction plan for chats must contain two specific applets. Create the applets in the following order, using the values as specified:
Set Data Source applet (SetDataSource)
Field Description Value Data Source Provide the exact value. CTI|CrmObjectId Value Identifies the object from the Data Connector applet that you create next. For example, $(Case|Id) Next applet Choose an appropriate applet to route the chat through next. Data Connector applet
Field Description Value Interface Salesforce Action Create Salesforce Record Object Choose the object to create. For example, Case Fields to Populate Choose at least one field to populate and choose a value to go in that field. Successful Action Choose the Set Data Source applet previously created. SetDataSource
Configure your call center in Salesforce
To configure your call center to use Webchat, perform the following steps:
- Go to Setup in Salesforce.
- On the left-hand side of the Salesforce window, in the search box, type 'Call Centers'. Call Centers appears below the search box.
- Click Call Centers. All Call Centers appears.
- Click the Vonage Contact Center in Salesforce call center.
- Click Edit.
- In CTI Adapter URL, append &openChat=true to the end. The complete URL should be
https://***.newvoicemedia.com/CallCentre/ServiceCloud/AgentInterface?newlogin=true&openChat=true. Replace***with the correct subdomain for your region:For example, if you are in the EMEA region, set CTI Adapter URL toRegion URL subdomain URL EMEA emea https://emea.newvoicemedia.com USA nam https://nam.newvoicemedia.com APAC apac https://apac.newvoicemedia.com https://emea.newvoicemedia.com/CallCentre/ServiceCloud/AgentInterface?newlogin=true&openChat=true. - In Softphone Width, set value to 635.
If Softphone Height, set value to 450. - Click Save.
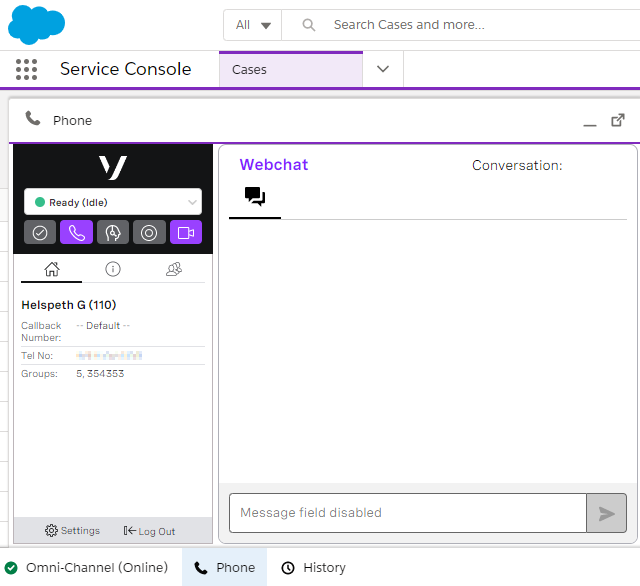
Webchat should now be visible in your Salesforce console.
For general assistance, please contact Customer Support.
For help using this documentation, please send an email to docs_feedback@vonage.com. We're happy to hear from you. Your contribution helps everyone at Vonage! Please include the name of the page in your email.


