For more information about groups, see User Admin.
In the User Admin area of the VCC Admin Portal, you can configure groups in the account you are logged in to.

The groups tab in User Admin supports URL navigation. You can directly navigate to the groups tab or bookmark your most frequently changing group.
To open the groups tab, use following pattern: https://***.newvoicemedia.com/CallCentre/portal/useradmin/groups, where *** represents the subdomain for the region of your VCC account.
To open a specific group, add the group's ID at the end of the url. For example, https://***.newvoicemedia.com/CallCentre/portal/useradmin/groups/###, where *** represents the subdomain for the region of your VCC account, and ### represents the ID of the group you want to open.
To create a group, you need the Manage Routing Settings permission. For information about feature permissions, see Configuring admin and supervisor feature permissions.
To create a new group in the account you are logged in to, perform the following steps:
When you have provided valid information in all mandatory fields, click Create. Your new group is created. Alternatively click Cancel to cancel creating this new group.
As an admin and supervisor user, after creating a new group you will automatically be granted write access to it; you will be able to see and manage this group. |
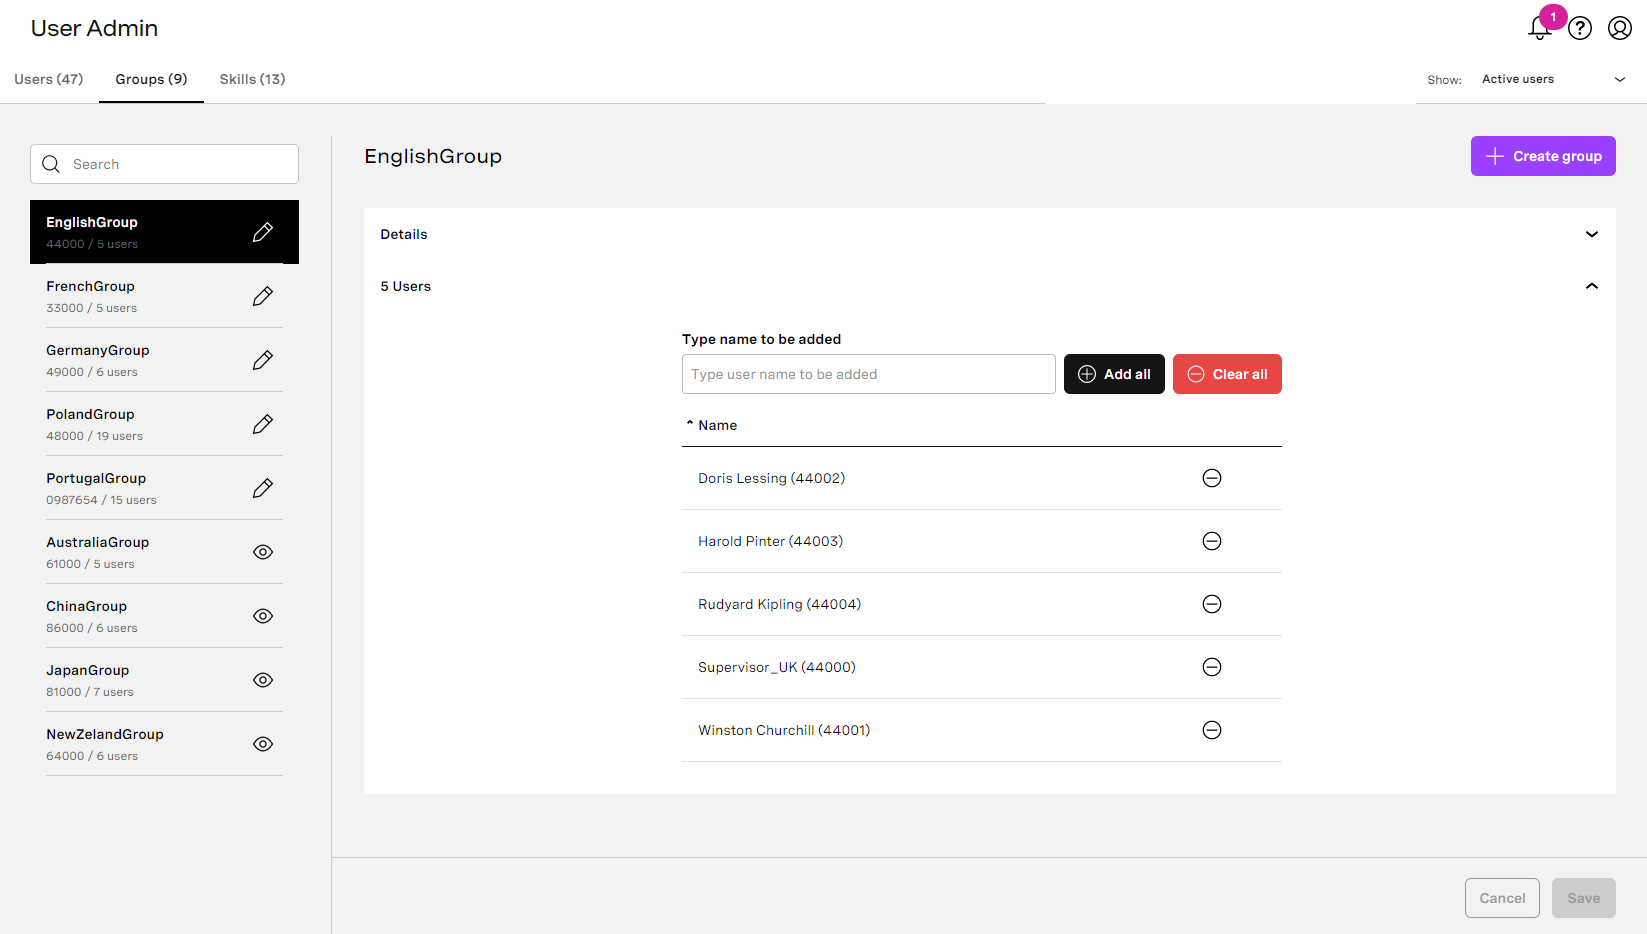
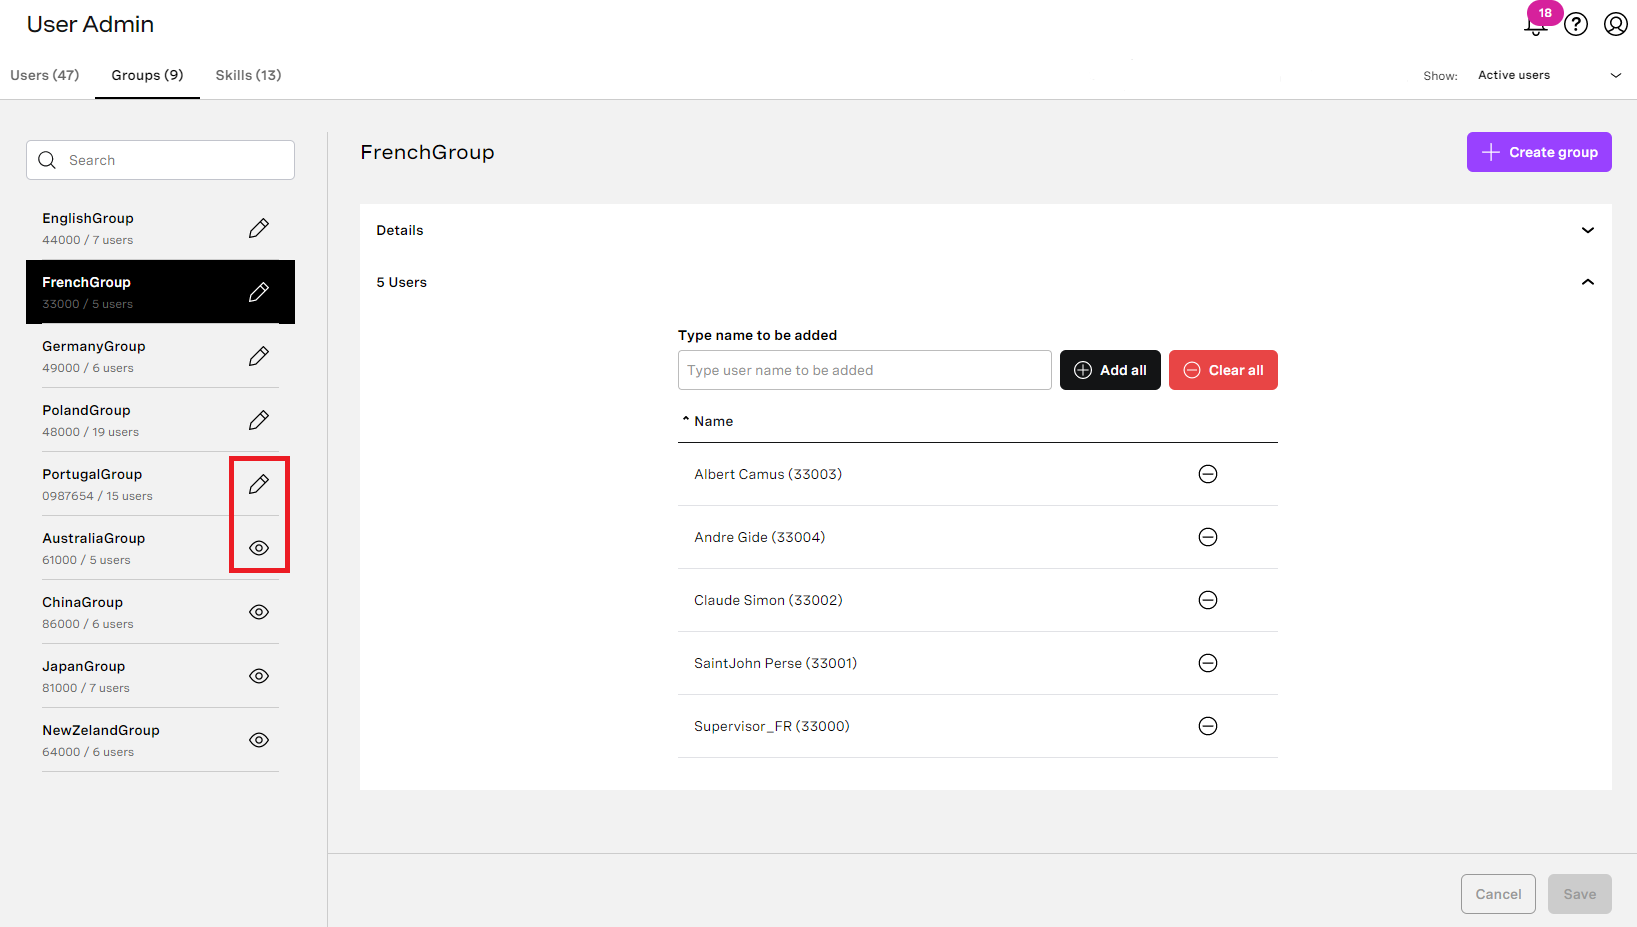
Go to Groups tab in User Admin area to see a list of groups in the account you are logged in to. From this list you can see each group's name and ID. The number of users in the group also appears. To edit the group you need to have the Manage Routing Setting permission. The icon on the right indicates whether you can edit (pencil icon) or view (eye icon) listed group.
As an admin user you can see and edit all groups available in the VCC account you are logged in to. As a supervisor user you can see or edit only those groups for which you have Read or Write permissions. You will not see groups for which you do not have permission. For information about Supervisor user permissions, see Supervisor permissions in User Admin. |

To edit a group, you need the Manage Routing Settings permission. For information about feature permissions, see Configuring admin and supervisor feature permissions.
To edit an existing group in the account you are logged in to, perform the following steps:
You can add one or more users while creating or editing a group as described above. You can also add users to a group in the following ways:
To remove a user from a group, you need the Manage Routing Settings permission. For information about feature permissions, see Configuring admin and supervisor feature permissions.
To remove one or more users from a group, perform the following steps:
To delete a group, you need the Manage Routing Settings permission. For information about feature permissions, see Configuring admin and supervisor feature permissions.
Only admin users can delete groups. |
To delete a group in the account you are logged in to, perform the following steps: