Configuring multiple users (using bulk actions)
A Vonage Contact Center (VCC) user is someone who interacts with VCC. A user's license determines the tasks they can perform. For more information about users, see User Admin.
In the User Admin area of the VCC Admin Portal, you can make multiple changes to one or more users in the account you are logged in to by adding them to bulk actions.
Who can I add to bulk actions?
You can perform bulk actions on all types of users.
You can filter the list of users to show only archived or active users to improve performance, particularly in accounts with large number of users; by default only active users appear in the list. For information about filtering users, see Accessing and finding your way around User Admin.
Admin users always have access to edit all users in the account they are logged in to.
Supervisor users have access to edit supervisor, wallboard and agent users who are:
- assigned to the group or groups that the supervisor has Write permission to
- not assigned to any group if the supervisor has the View Unassigned Users permission
Supervisor users also have access to edit other supervisor or wallboard users who are their managees, and themselves.
For information about setting supervisor permissions, see Supervisor permissions in User Admin.
How do I add an existing user or users to bulk actions?
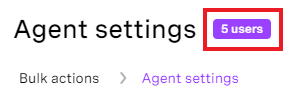
To start adding users to bulk actions, you need to enable bulk actions mode. To do that, click Bulk actions at the top of the page. After enabling bulk actions mode, the top bulk actions section appears. This section contains the number of users added to bulk actions, a pencil icon, and a Close button. Click the pencil icon to open the bulk actions side panel in which you can edit users. Click Close to close the bulk actions top section. Clicking Yes, close in that dialog box removes users from bulk actions and closes the top bulk actions section.

Adding a single existing user
After enabling bulk actions mode, a plus sign (+) appears to the right of every user. If the icon is unavailable, you do not have permission to edit this user. For information about setting supervisor permissions, see Supervisor permissions in User Admin. To add a single user to bulk actions, click the plus sign (+). The user is added to bulk actions and the information about the number of users in bulk actions increases.
Adding all users assigned to a group
To add all users in an existing group to bulk actions, go to the Groups tab. After enabling bulk actions mode, a plus sign (+) appears to the right of every group. Use search, or scroll through the list of groups, to find the group of users you want to add to bulk actions. Click the plus sign (+) to add users. If the plus sign (+) is unavailable, you do not have permission to edit this group and manage users assigned to this group; you cannot add the users from this group to bulk actions. For information about setting supervisor permissions, see Supervisor permissions in User Admin. After adding users to bulk actions, the number of users added to bulk actions in the top bulk actions section increases.
Adding all users with a skill
To add all users with an existing skill to bulk actions, go to the Skills tab. After enabling bulk actions mode, a plus sign (+) appears to the right of every skill. Use search, or scroll through the list of skills, to find the users with a skill you want to add to bulk actions. Click the plus sign (+) to add users. Only users you can edit will be added to bulk actions. For information about setting supervisor permissions, see Supervisor permissions in User Admin. After adding users to bulk actions, the number of users added to bulk actions in the top bulk actions section increases.
Adding users from bulk actions edit side panel
After clicking the pencil icon to open the bulk actions side panel, you can add additional users to bulk actions. Click Select users. All the users you can edit appear in the dropdown list. Select the checkbox to the left of any users you want to add to bulk actions. Click Apply.
Removing a user or users from bulk actions
The bulk actions side panel shows all added users in the top section. To remove a user from the list, click the minus sign (–) alongside the user's name. Alternatively click Select users. Clear the checkbox to the left of any users you want to remove from bulk actions. Click Apply.
How do I change one or more settings for more than one existing user at a time?
Bulk actions side panel and available sections
To open the bulk actions side panel and start editing users, click the pencil icon in the top bulk actions section.

With the bulk actions side panel, you can make changes to the users in each of the following sections:
- User status (Active/Archived)
- Agent settings
- Routing settings (Skills and Groups)
- Permission settings
Agent settings and Routing settings only appear if at least one of the users in bulk actions is acting as an agent user.
Permission settings only appears if at least one of the users in bulk actions is an admin, supervisor or wallboard user.
Bulk actions permissions
You can edit sections in the bulk actions side panel according to your permissions. For information about permissions in User Admin, see Accessing and finding your way around User Admin.
The Edit User permission allows you to edit the User status (Active/Archive) and Agent settings sections.
The Manage Routing Settings permission allows you to edit the Routing settings sections (Skills and Groups) .
If any of the sections are not available, you do not have permissions to edit them. For information about editing linked account permissions, see Editing linked account permissions.
User filtering
When you open a particular section in the bulk actions side panel, any users that the settings cannot be applied to are filtered out. For example, opening Agent settings filters users who do not act as agents, as you can only apply agent settings to agents, and supervisors, or admins, who also act as agents. The number of users that the settings will be applied to is shown in the badge next to the section title.
Navigating through the bulk actions side panel
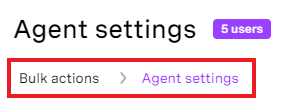
When you open bulk actions, the bulk actions side panel appears in front of the main screen. When you open specific sections (such as Agent settings or Skills), the new sections appear in the side panel. At the top of each screen, under the title, breadcrumbs appear, showing your location within the bulk actions side panel. You can move to previous screens or to the main bulk actions screen by clicking the breadcrumbs. Your current location is marked in purple.
Changing settings
When you open the bulk actions side panel, all available settings are, by default, empty or not selected. No shared settings are highlighted or listed. Only settings that you change or add will be applied to users in bulk actions.
For example, if all users—either agent users or users who are acting as agents—added to bulk actions have a different value set in Location, in the Agent settings section, value of Location will be 'Not selected'. Setting Location to 'United Kingdom +44' in bulk actions will update the value of Location for all users.
| User | Original Location | Updated Location |
|---|---|---|
| 1 | United Kingdom +44 | United Kingdom +44 |
| 2 | United Kingdom +44 | United Kingdom +44 |
| 3 | Poland +48 | United Kingdom +44 |
| 4 | Poland +48 | United Kingdom +44 |
| 5 | Italy +39 | United Kingdom +44 |
If these same users have a mixture of assigned skills and levels, in the Skills section, Add skills and Remove skills will be empty.
Selecting 'English' in Add skills and setting the level of that skill to '8' will add the English skill at level 8. If a user already had that skill at level 8, no changes would be applied. If they had that skill at a different level, their level would be changed to level 8. If the user didn't have the skill, they would be given it at level 8.
Selecting 'French' in Remove skills would remove the French skill from any user who had it.
| User | Original skills and levels | Updated skills and level |
|---|---|---|
| 1 | English—8 | English—8 |
| 2 | English—5 | English—8 (increased level) |
| 3 | Polish—7 | Polish—7 English—8 (added) |
| 4 | French—2 |
|
| 5 | Italian—4 French—3 Polish—7 | Italian—4 |
User status
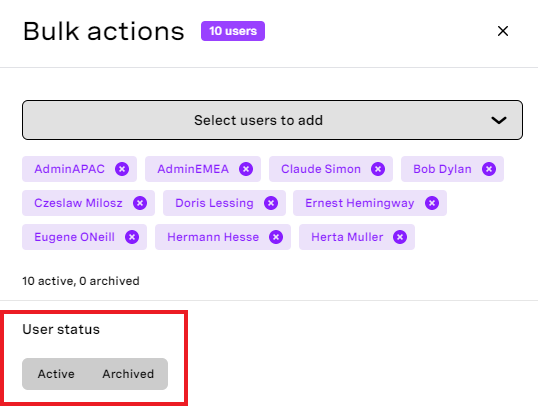
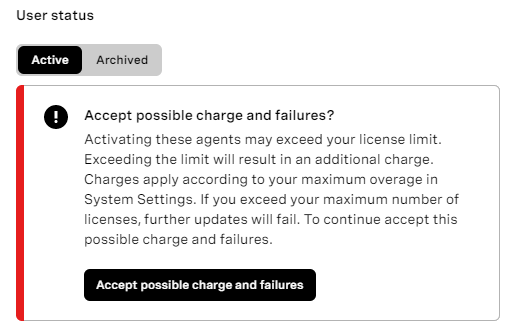
The User status section contains configuration for all users added to bulk actions. By default, fields have no value selected. You can set the users' status to archived or active. The image above shows the current status of the users in bulk actions. If you click to activate the agent users a warning message about possible additional charges or failures after activating those agents may appear. This warning message appears according to your license configuration. For information about license configuring, see Configuring licenses. Either accept these possible charges and failures or discard user status changes to continue making changes in bulk actions side panel.
Agent settings
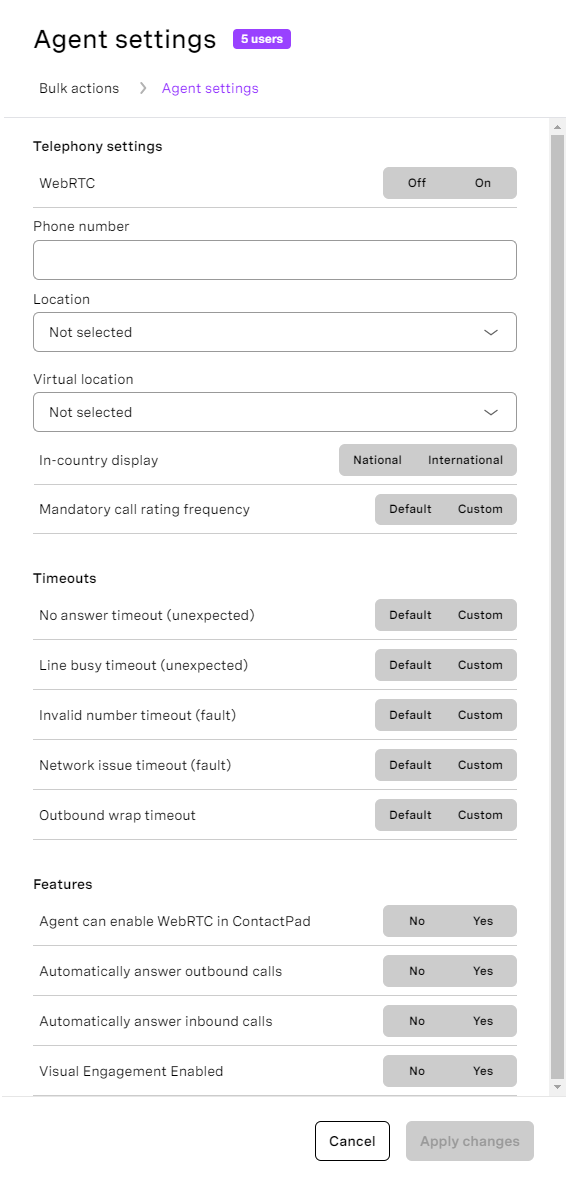
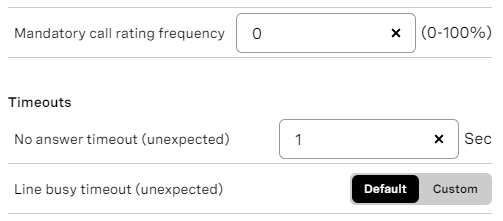
The Agent settings section contains all available configuration for users who act like agents. By default, all fields are empty or have no value selected and you start with an empty form. You can specify the users' location, set the same phone number for all users, enable user-level features, or configure users' timeouts. To the right of specific timeout, the Default | Custom toggle appears. If you select Default, all users are updated with the default value specified for the account. If you select Custom, the new field appears in which you can specify a customer value. If you provide a value, this value will be applied as a custom configuration for all users added to bulk actions. If you don't want to provide custom value, click X to go back to the original state.
Routing settings—Skills
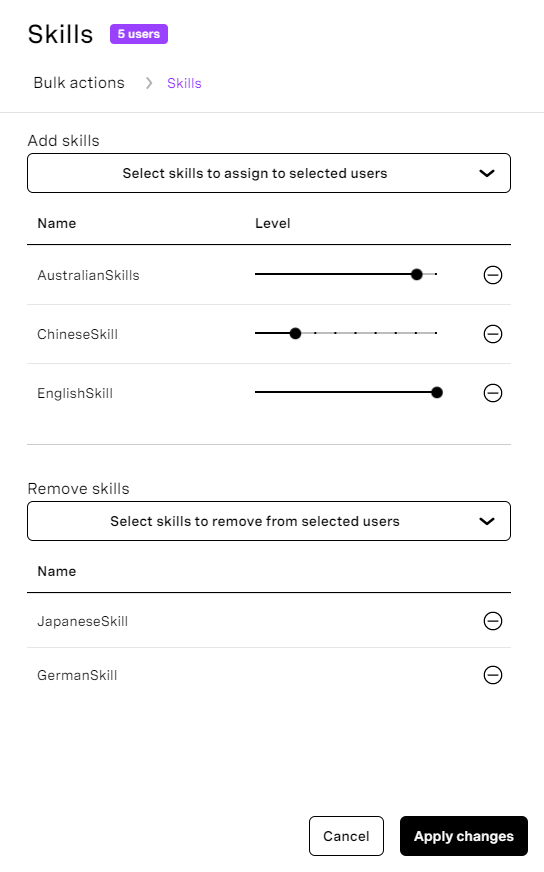
The Skills section contains Add skills and Remove skills. In Add skills, you can specify which skills you want to assign to users added to bulk actions. You can also provide specific levels for added skills. In Remove skills, you can choose skills you want to remove from users.
In the following example, after applying changes, the five users added to bulk actions will have AustralianSkills (level 9), ChineseSkill (level 3), and EnglishSkill (level 10). JapaneseSkill and GermanSkill will be removed if any of the users from bulk actions had those skills. All other skill configurations for users added to bulk actions stays the same.
Routing settings—Groups
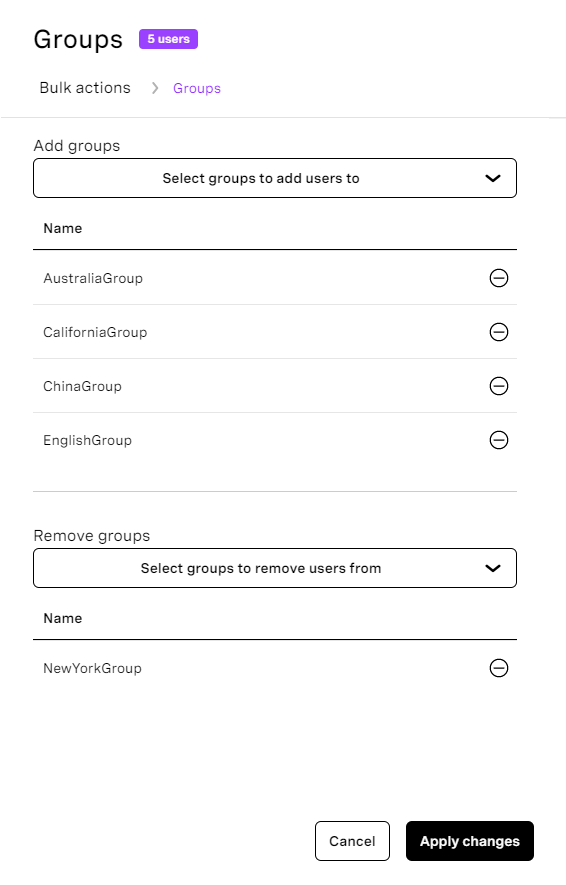
The Groups section contains Add groups and Remove groups. In Add groups, you can specify which groups you want to add users from bulk actions to. In Remove groups, you can select groups to remove users from.
In the following example, after applying changes, five users will be added to AustraliaGroup, CaliforniaGroup, ChinaGroup, EnglishGroup, and will be removed from NewYorkGroup. All other groups configuration for users added to bulk actions stays the same.
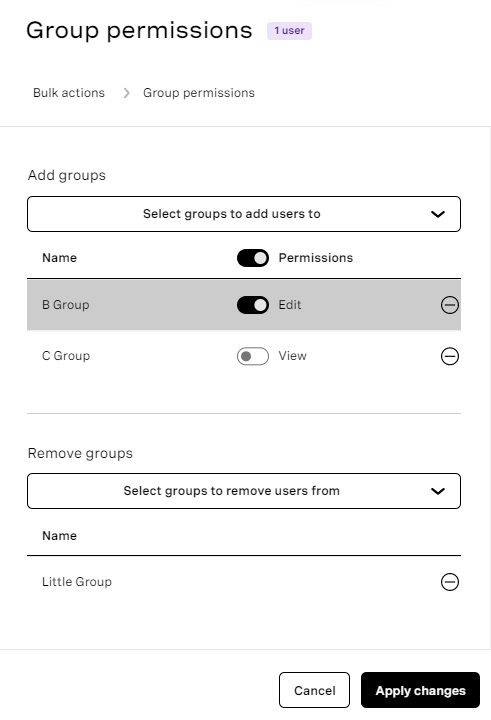
Permissions settings—Group permissions
The Groups permissions section contains Add groups and Remove groups. In Add groups, you can specify which groups of users you want to give users in bulk actions permissions to configure. In Remove groups, you can select groups to remove users from.
In the following example, after applying changes, one user will be given Edit permission for B Group and View permission for C Group, and permissions will be removed from this user for Little Group. All other group permissions for the users added to bulk actions stays the same.
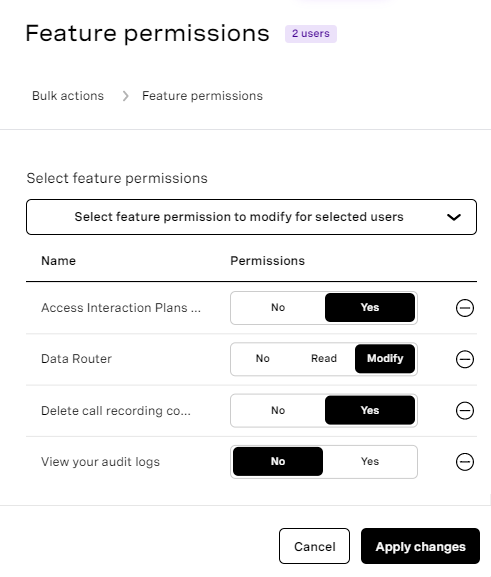
Permissions settings—Feature permissions
The Feature permissions section contains Select feature permissions. In Select feature permissions, you can search for and select features that you want to give users from bulk actions permissions to use. When you have chosen the features you want to give permissions for, click Apply. Next select the required permission level for the users. Select from No | Yes or No | Read | Modify. You must set a permission level for all the features you have selected.
In the following example, after applying changes, two users will be given permission to access Interaction Plans Architect and to delete call recording comments, but will not have permission to view their own audit logs. The users will also have permission to modify Data Router applets. All other feature permissions for the users added to bulk actions stays the same.
Saving changes
To save your changes, click Apply changes.
Bulk actions progress
When you apply changes, the Bulk actions progress screen appears. At the top of the side panel, a progress bar indicates the progress of updating users. Below the progress bar, user update statuses appear dynamically in the table. All users with successful updates appear in the Passed section with a result of OK. If any of the updates fail, the users appear in the Failed section and appropriate result messages are displayed.
After updating all users, you can make one of the following choices:
- Continue: go back to main bulk actions screen and continue making bulk changes.
- Exit bulk actions: stop making changes in bulk actions. This closes both the bulk actions side panel and the bulk actions top section.
Cancelling changes
To cancel all your changes, click Cancel. If you have any unsaved changes, a dialog box will appear to ask you to confirm that you want to cancel you changes.
For general assistance, please contact Customer Support.
For help using this documentation, please send an email to docs_feedback@vonage.com. We're happy to hear from you. Your contribution helps everyone at Vonage! Please include the name of the page in your email.