Post-Upgrade Steps for Motivate v3 (base app v7)
Prior to using Motivate, it is necessary for a System Administrator to customise certain aspects of the application that cannot be done automatically during the package upgrade. The steps are necessary due to the changes that have been introduced in this version.
Automated Setup
The Automated Setup routine must be re-run in order to add new Help Text to existing Base Behaviour fields.
- Enter Setup by clicking on the Setup link at the top of the screen
- Within the sidebar select Build | Installed Packages
- Click on Configure next to the Motivate package name
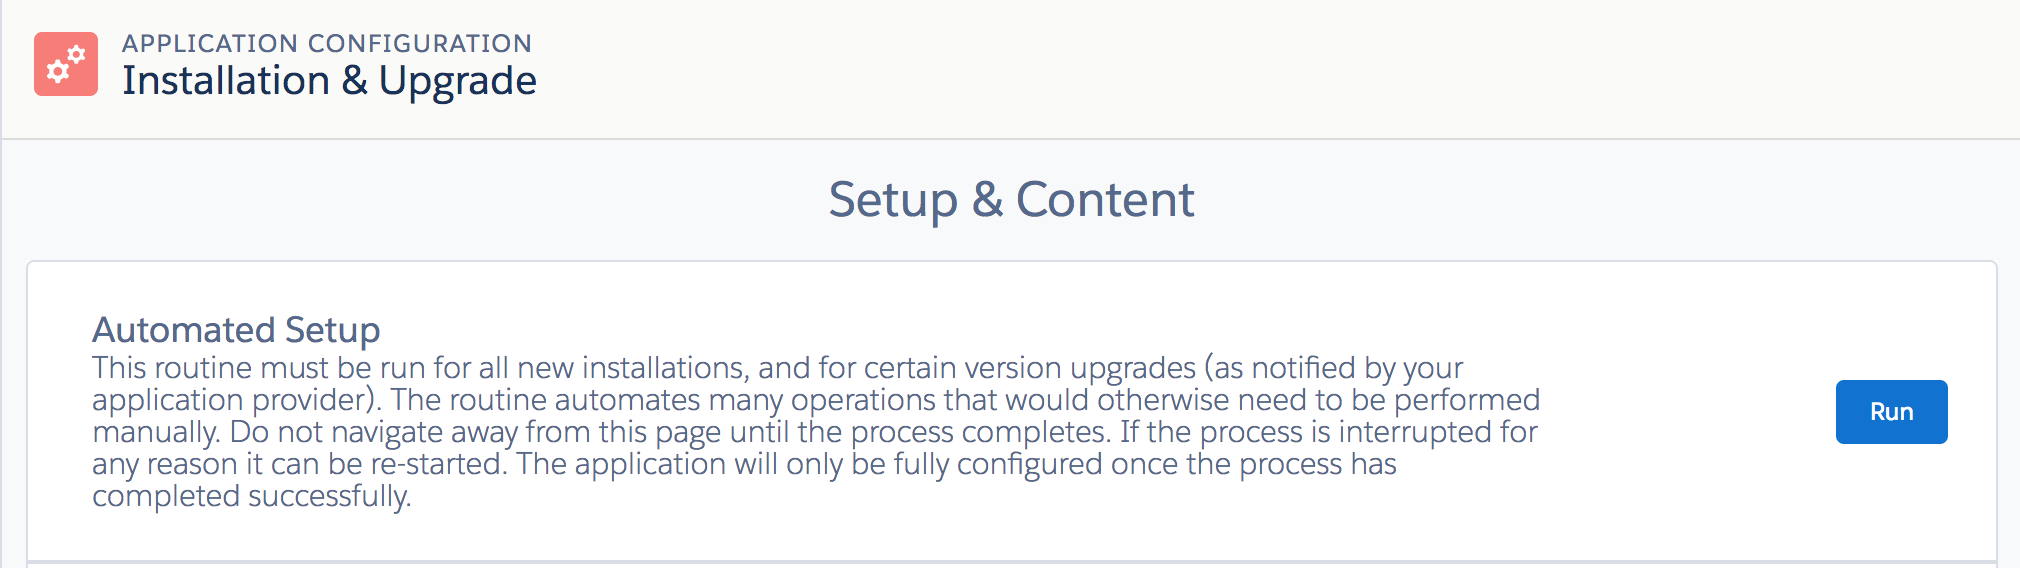
- On the Application Configuration page, expand the Installation & Upgrade section
- Click Run next to Automated Setup and wait for the "COMPLETED" message before continuing.
Update the NVM app logo
The NewVoiceMedia app logo cannot be replaced during the automated upgrade steps, so needs to be carried out manually:
1. Enter Setup by clicking on the "Setup" link at the top of the screen
2. Within the sidebar select Build | Create | Apps
3. Click Edit next to the "Motivate" link
4. Click the "Insert an Image" button
5. Select "NewVoiceMedia Documents" from the File Location picklist
6. Click on the "Motivate Application Logo 3"
7. Click Save
Salesforce Classic
Manual Rewarding (Optional)
Follow the steps below to set up the Manual Rewarding functionality, which allows Motivate users with the required permission to award individual Motivate Players with Rewards and Badges. Once set up, those Motivate users with the required permission can generate Rewards using the Create Reward UI that is accessed via Chatter.
- Enter Setup by clicking on the "Setup" link at the top of the screen
- Within the sidebar select Build | Create | Global Actions | Publisher Layouts
- Click Edit next to Global Layout
- In the Global Layout section at the top of the page, click on Quick Actions:

- Locate Create Reward and drag it onto the Salesforce Classic Publisher Global Publisher:
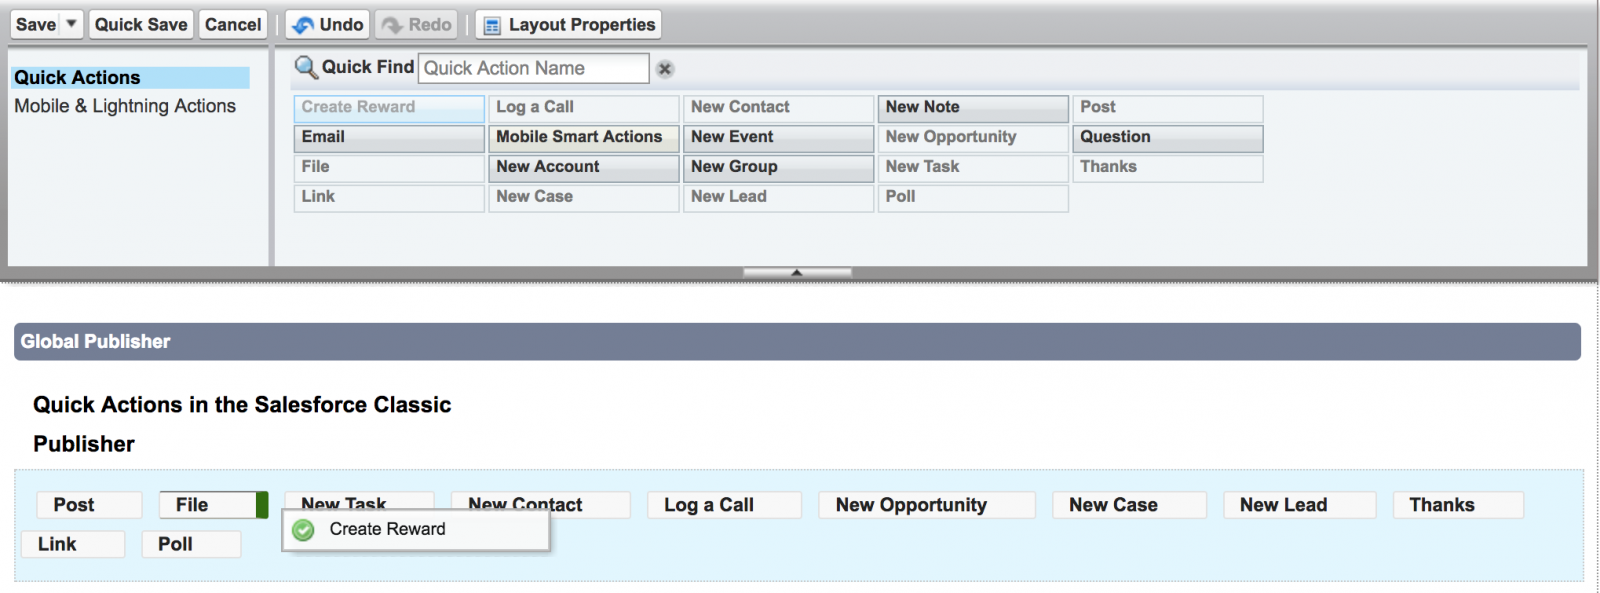
- Click the Save button to complete the task and save your changes to the Global Layout
- Within the sidebar select Administer | Manage Users | Users
- Click on the name of the user who should be delegated the permission to use Manual Rewarding
- Under Permission Set Assignments click the Edit Assignments button
- In the Available Permission Sets list, add Create Manual Rewards to the Enabled Permission Sets list
- Click the Save button
Salesforce Lightning
In order to configure the Lightning UI components that are discussed below, customers are required to first set up and deploy Salesforce's My Domain feature. Customers who do not enable this feature will not be able to perform the setup steps that are detailed in this section. However, once My Domain has been set up for the org, customers will be able to access the Lightning components that are contained in the Motivate package and configure them as required.
Details on what My Domain is and how it can be enabled and configured can be found in this Salesforce Help article: https://help.salesforce.com/articleView?id=domain_name_overview.htm&type=0
Object Page Layouts
The following operations can be performed for each of the page layouts on each of the following objects: Accounts, Campaigns, Contacts, Leads, Opportunities, Cases, Contracts, Solutions, Events and Tasks. Customers are required to add the same Lightning component to each of the object record pages; as the components are context aware, they will return the appropriate data based on the object.
The following steps are specifically for the Account page layout: however, the same steps can be repeated for the other page layouts using the same Lightning components.
It is recommended that the Classic Visualforce In-line componenets are removed from the object page layouts so that they are not visible in Lightning Experience in addition to the Lightning version of the components.
In order to add the Lightning components to each page layout, customers will need to be running in Lightning Experience in order to access the Lightning App Builder.
- Navigate to any Account record, click on the Setup button and then click on Edit Page
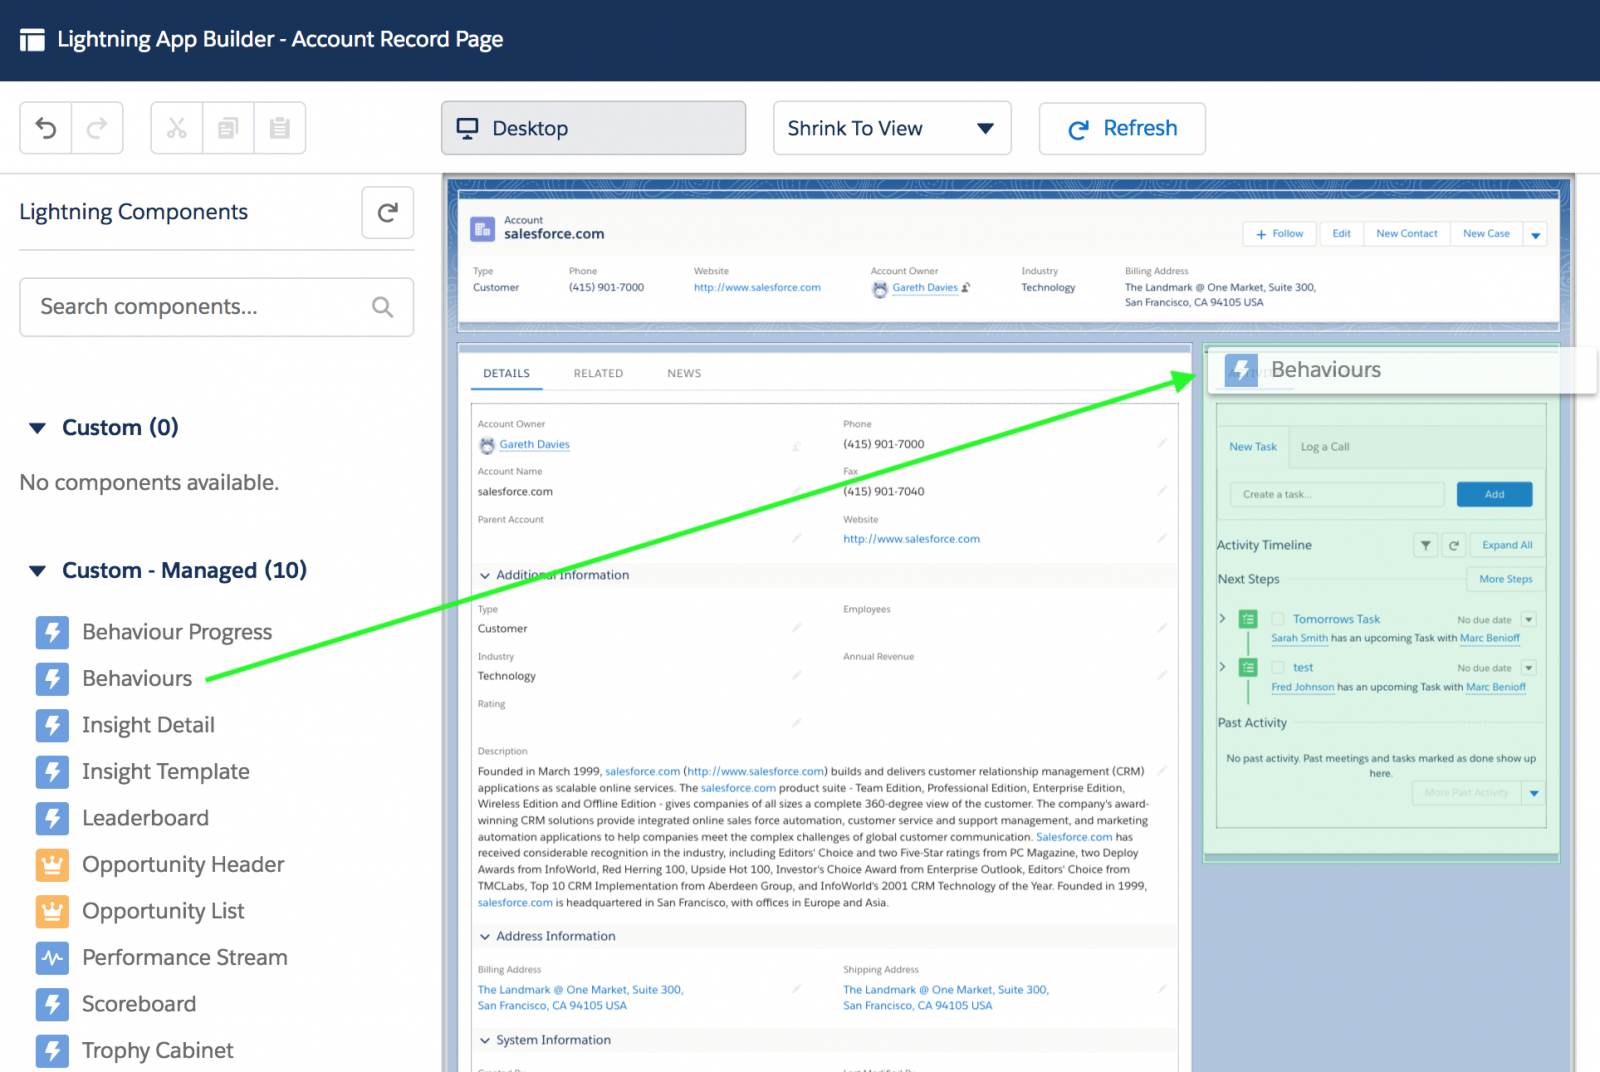
- In the Lightning App Builder within the left-side Lightning Components list, locate the Behaviours component under the Custom - Managed section
- Drag the Behaviours component onto the page layout and drop it onto a suitable position within the narrow area of the layout (as shown below).
- Repeat the same progress for the Trophy Cabinet, and position the component above or below the Behaviours component.
- Click the Save button to complete the task and save your changes to the page layout
- Repeat these steps for the Page Layouts for any of the following Objects as required:
- Activities - Events
- Activities - Tasks
- Campaigns
- Leads
- Contacts
- Opportunities
- Cases
- Contracts
- Solutions
Utility Bar
For each Lightning app that is available to users, customers are able to configure the Utility Bar to include the Performance Stream component. When users are in an app that has the Utility Bar configured, they will have access to the Performance Stream at all times.
The following steps detail how the Performance Stream can be added to the Utility Bar in the Sales (Lightning) app, however the same steps can be repeated to configure the Utility Bar in other Lightning apps.
In order to add the Performance Stream component to the Utility Bar, customers will need to be running in Lightning Experience in order to access the Lightning Experience App Manager.
- Click on the Setup button at the top of the screen and then clicking on Setup link
- Within the sidebar under Platform Tools | Apps click on App Manager
- Locate the Lightning version of the Sales app, then click on the Edit link in the dropdown list
- In the Edit App modal, click on the Utility Bar tab
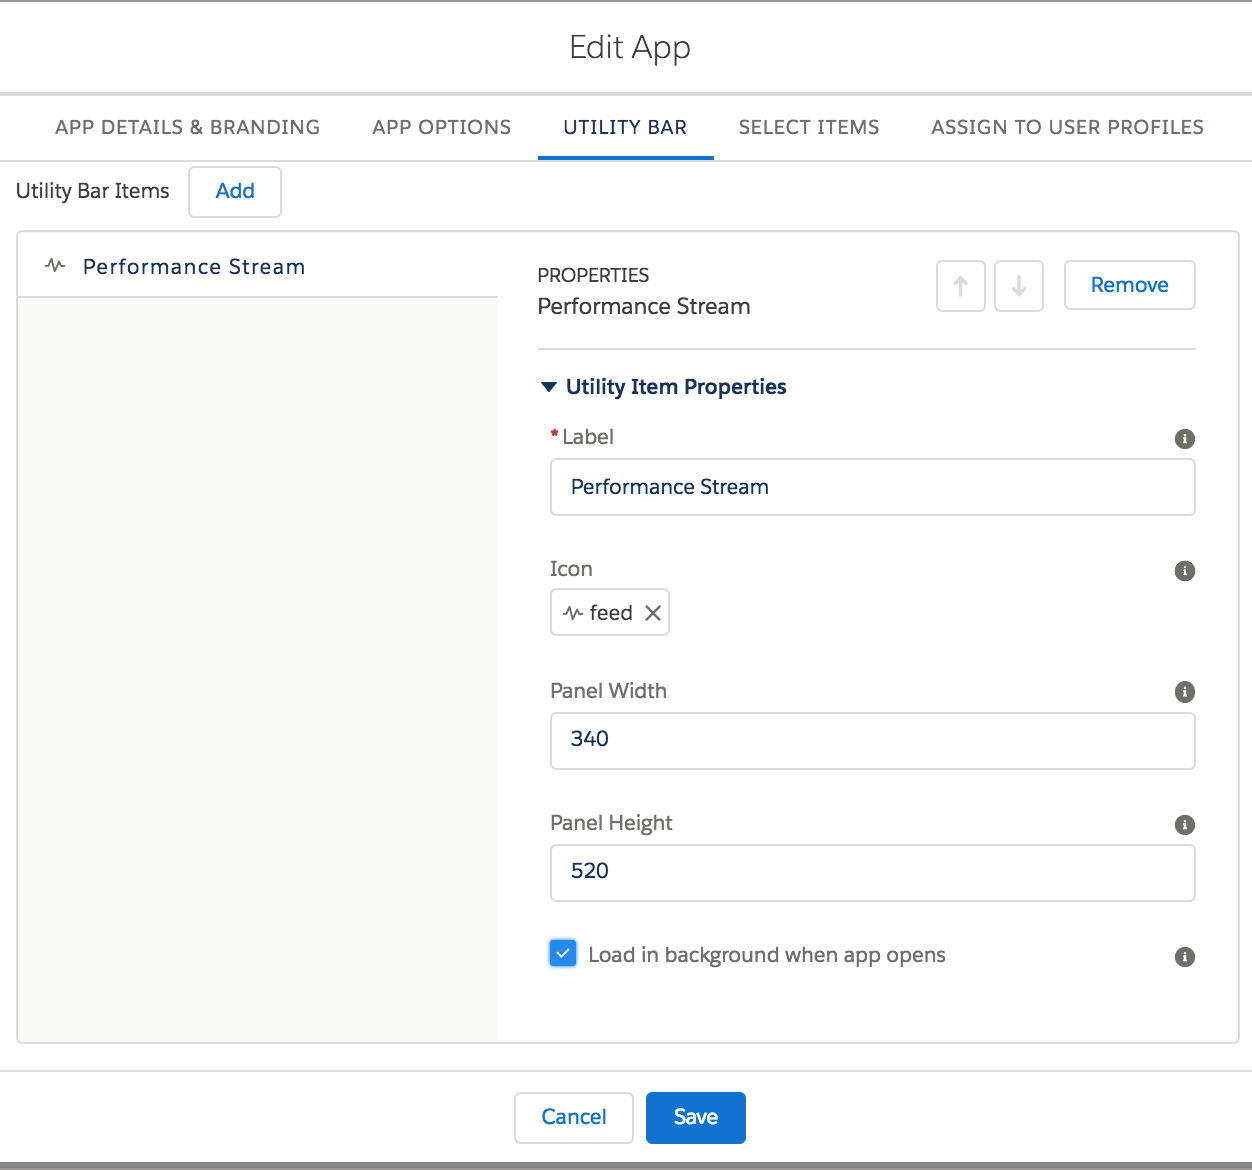
- Click the Add button and select the Performance Stream from the Custom - Managed section
- In the Properties of the Performance Stream, under Icon click on the cross next to the icon image to remove it
- Click on the Choose Icon button, and in the Choose Utility Icon window, select the icon named 'feed'
- Leave the Panel Width and Panel Height as the default values.
- Select the Load in Background when app opens checkbox
- Click the Save button to complete the task and save your changes to the Utility Bar
Toast Notifications
For Motivate Players to receive Toast Notifciations in Lightning Experience when they have earned a Reward, customers must follow the steps below in order to configure the URL Settings in the Application Configuration page. The steps below describe how to configure the Toast Notifications when in Lightning Experience; however, the steps can be carried out in either Salesforce Classic or Lightning Experience.
The Performance Stream must be configured as described above, in order for the Toast Notifications to function.
- Click on the Setup button at the top of the screen and then click on the Setup link
- Within the sidebar under Platform Tools | Apps click on Installed Packages
- Click Configure next to the Motivate package
- Expand the Configuration section, and then locate the URL Settings
In the Domain field, enter the domain name of the org in the format: https://domain.lightning.force.com replacing domain with the domain that the org is using
Ensure that https:// is set at the beginning of the Domain field and no characters are present at the end of the domain, i.e. after the .com or other specified domain extension.
This information can be found by inspecting the URL in the Address Bar of your Web Browser
- Click the Save button to complete the task and set the Domain URL
- Log out of the org immediately and then log back in
Performance Centre
The Performance Centre is the main page from where Motivate Players can monitor their performance in real time. The following steps describe how this page can be created using a specific Lightning Custom Layout that is provided in this release, and then configured by adding the new Lightning Motivate Player UI components.
Following these steps will provide Motivate Players access to the Performance Centre on a Desktop. If access is required on Mobile and Tablet devices via Salesforce1, please see the Salesforce1 Setup for Motivate v3 (base app v7) page.
- Click on the Setup button at the top of the screen and then click on the Setup link
- Within the sidebar under Platform Tools | User Interface click on Lightning App Builder
- Click on the New button
- Select App Page and then click the Next button
- In the Label field, enter Performance Centre and then click the Next button
- Under the Custom section in the left-side, select Performance Centre Template and then click the Finish button
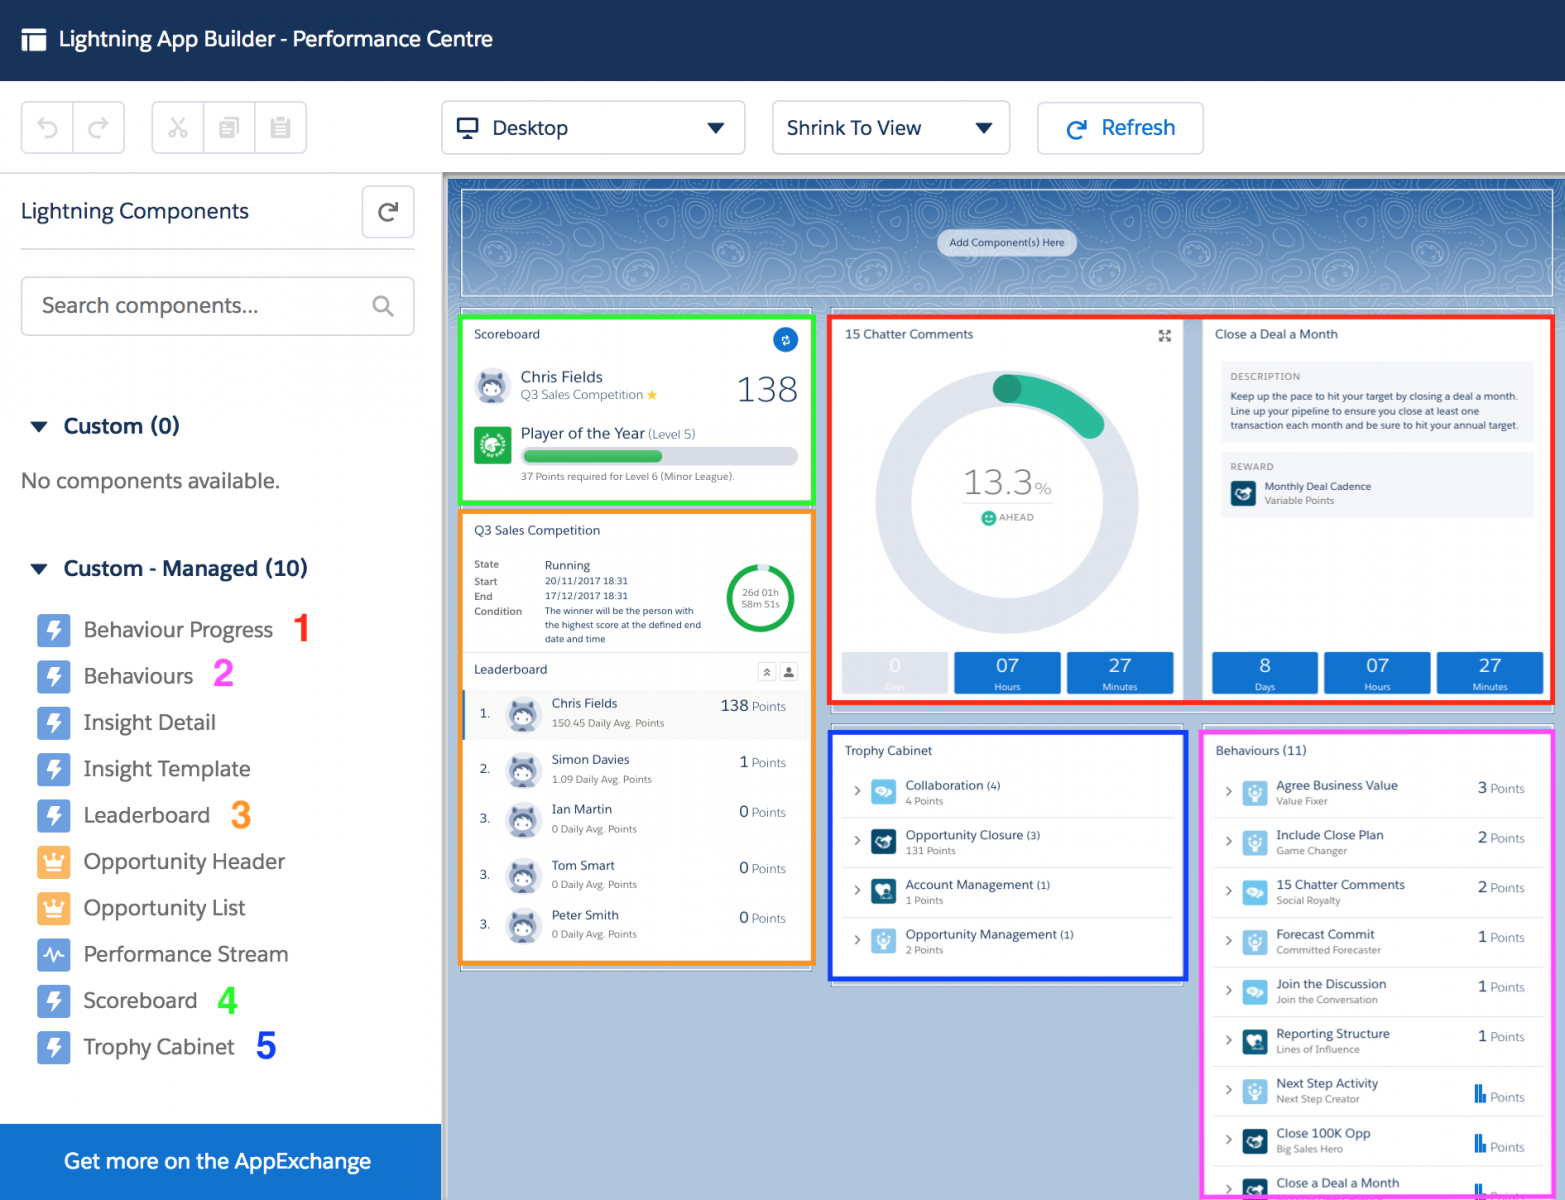
- In the Lightning App Builder, drag and drop the following Lightning Motivate Player UI components onto the Performance Centre page as shown below
- Scoreboard
- Leaderboard
- Trophy Cabinet
- Behaviours
- Behaviour Progress
- Once the components have been added to the Performance Centre page, click on the Save button
- In the Page Save modal that is displayed, click on the Activate button
- In the Activation modal under the Page Settings tab, click on the Change... link next to the Icon
- In the Select an icon modal, locate and click on the Radar Dish icon

- In the Activation modal under the Lightning Experience tab, select the Sales Lightning App in the left column, and then click on the Add page to app button to add the Performance Centre page to the right column
- In the right column, drag and drop the Performance Centre to the desired position that it will be displayed on the Tab bar
- Repeat steps 12 and 13 for all other Lightning Apps that require access to the Performance Centre page
- Click the Save button to return to the Lightning App Builder
- Click the Back button to complete the task and finish configuring the Performance Centre page
Manual Rewarding (Optional)
Follow the steps below to set up the Manual Rewarding functionality, which allows Motivate users with the required permission to award individual Motivate Players with Rewards and Badges. Once set up, those Motivate users with the required permission can generate Rewards using the Create Reward UI that is accessed via Chatter.
- Click on the Setup button at the top of the screen and then click on the Setup link
- Within the sidebar under Platform Tools | User Interface | Global Actions click on Publisher Layouts
- Click Edit next to Global Layout
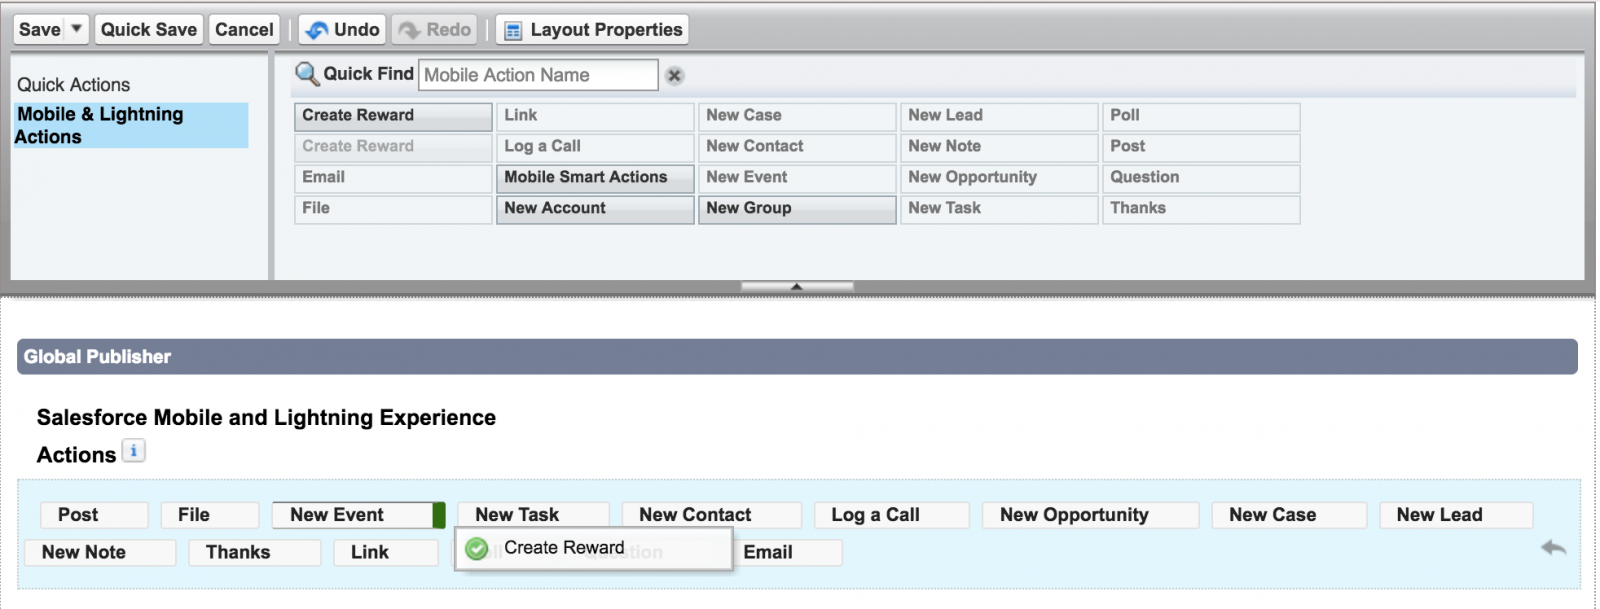
In the Global Layout section at the top of the page, click on Mobile & Lightning Actions:

You may be required to override the predefined actions in Salesforce Mobile & Lightning Experience Actions in order to add the Create Reward action. If this is performed, please remove the currently added Create Reward (success__Manual_Rewards_Classic) action that is inherited via the override before continuing
- Locate Create Reward and drag it onto the Salesforce Mobile & Lightning Experience Actions Global Publisher:
- Click the Save button to complete the task and save your changes to the Global Layout
- Within the sidebar select Administration | Users | click on Users
- Click Edit next to the User who should be delegated the permission to use Manual Rewarding
- Under Permission Set Assignments click the Edit Assignments button
- In the Available Permission Sets list, add Create Manual Rewards to the Enabled Permission Sets list
- Click the Save button
The Motivate Upgrade is now complete!
Optional Set-up steps
For general assistance, please contact Customer Support.
For help using this documentation, please send an email to docs_feedback@vonage.com. We're happy to hear from you. Your contribution helps everyone at Vonage! Please include the name of the page in your email.