Viewing a Team Monitoring dashboard
When you have accessed Team Monitoring, and have located the dashboard you want to view, to open the dashboard, click its row or tile. The dashboard appears.
| In this page |
|---|
Team Monitoring dashboard display
Tabs
Depending on the configuration of your dashboard, there will be one or more tabs. The first tab is the dashboard itself. Any other tabs contain linked or embedded Real-time Analytics dashboards.
Search and filter
Beneath the tabs, the search and filter options appear:
- Search for agents by name. For information about searching for agents, see Filtering agents in a dashboard later in this page.
- Apply filter sets. For information about filter sets, see Using filter sets later in this page.
- Expand the dashboard to fit screen. To expand the dashboard to fit to screen, click the expand icon .
- Show or hide columns. For information about showing and hiding columns, see Showing or hiding columns later in this page.
- Edit the dashboard. For information about editing the dashboard, see Editing a Team Monitoring dashboard in Creating and editing dashboards in Team Monitoring.
Agent list
A Team Monitoring dashboard contains a list of agents. These agents were added individually, or are in the groups or have the skills added to the dashboard. You can see only agents who are in groups you have access to through group permissions. Each row in the list contains an agent and the following information relating to that agent:
- Name. The name of the agent as configured in User Admin.
- Agent state. The agent's summary state, determined by combining the agent's presence and interaction states.
- Presence state. The presence state indicates the agent's current and upcoming availability. It also determines whether interactions can be routed to them. If the agent's presence state changes elsewhere in VCC — for example, if the agent updates their state in ContactPad — their state will update here. The time since the presence state last changed also appears and updates continuously.
- Interaction state. Gives an overview of the current states of interactions that the agent is involved in. The time since the interaction state changed also appears and updates continuously.
- Skills. A list of skills assigned to the agent.
- Groups. A list of groups the agent belongs to.
Filtering agents in a dashboard
You can search for a specific agent by typing part of the agent's name in Search for agents by name. The list of agents updates as you type. Or you can filter the list by presence states, interaction states, skills, or groups. You can optionally save your filter choices in a filter set.
Filtering agents
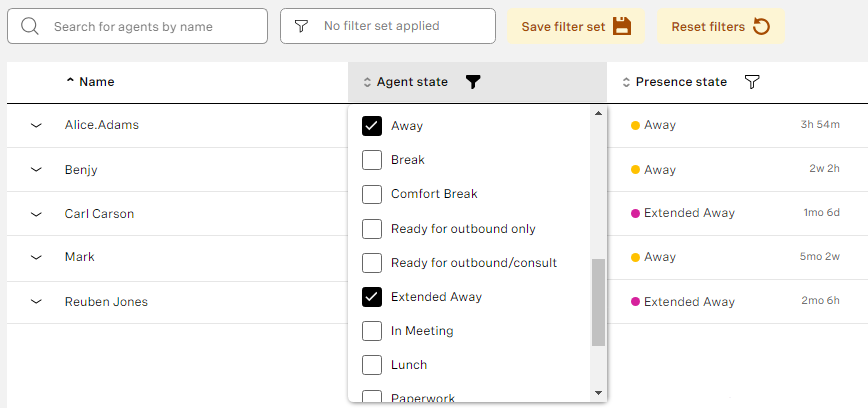
To filter the list of agents, click the funnel iconin the column you want to filter by. The list of values in the column appears.
Search or scroll to find values you want to include in or exclude from your filter, and then select or clear values as required. Alternatively, click Select all or Clear to select or clear all the values in the list. Clearing all the values in the list will remove all the agents from the dashboard view.
The list of agents updates as you select and clear values. Save filter set and Reset filters buttons also appear. The funnel iconin the filtered column changes appearance.
To clear filters, click Reset filters.
Showing or hiding columns
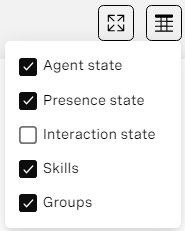
To add or remove columns from view, click the column icon . The columns in the dashboard appear.
Select or clear the columns you want to show or hide in the dashboard.
The dashboard updates as you select and clear columns. Save filter set and Reset filters buttons also appear.
Using filter sets
Filter sets are collections of filter and column visibility options. You can create filter sets tailored for various monitoring purposes — such as overseeing individual teams or agents with particular skills or groups, or tracking agents who are currently idle — enabling you to manage large team dashboards without needing to navigate multiple dashboards. When you create filter sets, they are saved with the dashboard, making them accessible to other users.
Applying a filter set
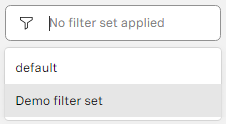
To apply a filter set or — if you have already applied a filter set — change to a different filter set, click the filter set field and select an available filter set.
Saving or updating a filter set
When you select filter options, columns to show or hide, or both, Save filter set or Update filter set appear.
- If you do not have a filter set applied, to save your selections as a new filter set, click Save filter set. Save as filter set? appears. Provide a name for the filter set and click Save filter set.
- To update your currently selected filter set with your updated selections, click Update filter set. Update filter set appears. Click Update filter set.
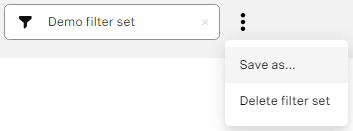
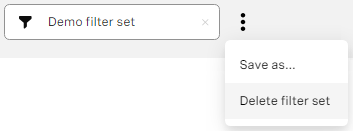
- To save your currently selected filter set with or without updated selections as a new filter set, click the menu iconalongside the selected filter set and then click Save as.... Save as new filter set? appears. Provide a name for the filter set and click Save new filter set.
Resetting filters
When you select filter options, columns to show or hide, or both, Reset filters appears.
To reset your selections, click Reset filters. If you have a filter set applied, resetting your selections will clear any changes to the filter set.
Deleting a filter set
To delete the currently selected filter set, click the menu iconalongside the selected filter set and then click Delete filter set. Delete filter set? appears. Click Delete filter set.
Viewing an individual agent in a dashboard
To see a list of skills assigned to an agent, the groups they are in, and any interactions they are handling, click the agent's row to expand their details in a panel.
For general assistance, please contact Customer Support.
For help using this documentation, please send an email to docs_feedback@vonage.com. We're happy to hear from you. Your contribution helps everyone at Vonage! Please include the name of the page in your email.

